Category: Landscaping Guides

  • Low Maintenance Front Yard Ideas: Arizona High-Desert Guide

    Low Maintenance Front Yard Ideas: Arizona High-Desert Guide

    The best low maintenance front yard ideas Arizona homeowners use pair a clear layout with durable materials: gravel or decomposed granite as the main surface, a few well-set boulders, a solid entry walkway, crisp edging, drip irrigation on a timer and only a small turf panel if you want green. Plan zones first, then pick materials that stay put.

    Key takeaways

    • Low maintenance comes from layout decisions, not from covering everything in rock.
    • Choose one main ground cover, lay it at the right depth and contain it with real edging.
    • Boulders and a defined walkway give curb appeal that needs almost no upkeep.
    • Keep any turf panel small, simple in shape and separated from gravel by a hard border.
    • A pre-emergent plan and a drip system on a controller remove most weekend chores.
    • Check HOA rules early and build in phases if the budget needs it.

    What makes a front yard truly low maintenance in Arizona?

    Most homeowners asking about low maintenance front yard ideas in Arizona picture a yard they can ignore. In practice, the yards that stay good-looking with the least effort are the ones where every surface has a job, every edge is defined and water goes only where it is needed. A front yard covered wall to wall in loose rock with nothing holding it in place can actually create more work than a thoughtfully planned one, because rock drifts into the walkway, weeds find every gap and the whole thing starts to look tired after one season.

    Think of upkeep in terms of recurring tasks. A traditional lawn front yard asks for mowing, edging, fertilizing, overseeding and frequent watering. A well-designed low-water front yard reduces that list to a handful of jobs: a spring and late-summer weed check, an occasional rake of the gravel, a look at the drip lines a few times a year and light shaping of shrubs. The goal of this guide is to help you design for that short list from the start.

    The three questions that shape every easy-care front yard

    • How do people move through the space? Guests, delivery drivers and your own trips to the mailbox all need an obvious, firm path.
    • What should someone notice from the street? One or two focal points beat a dozen small features that each need attention.
    • Which parts need water? If you can answer “only the planting pockets,” your maintenance load drops sharply.

    Answering those questions on paper before any material is ordered is the single biggest money and time saver in a front yard project. It is also exactly the kind of thinking our landscape design service in Prescott is built around.

    Plan zones before you choose materials

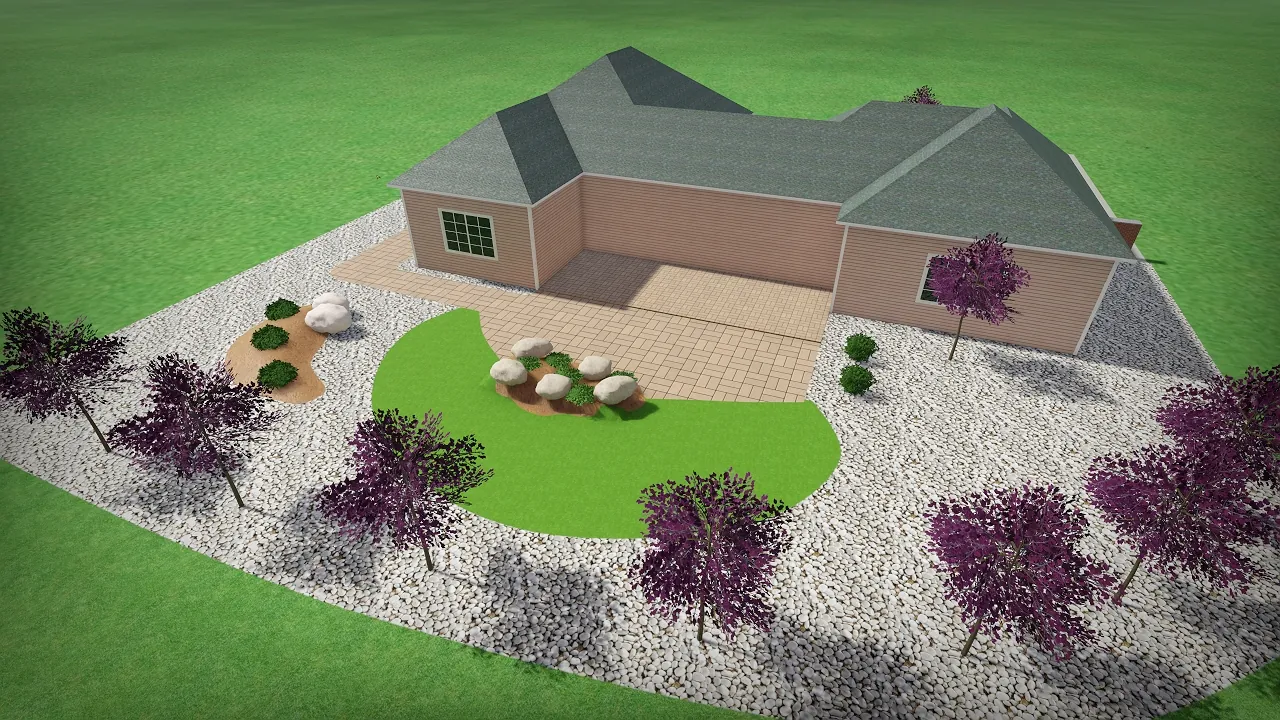
    A front yard usually breaks down into four zones: the arrival path, the frame around the house, the street edge and the open field in between. Sketching those zones, even roughly on graph paper or over a printed aerial photo of your lot, makes material choices almost obvious.

    Zone Purpose Easy-care treatment
    Arrival path Gets people from driveway or sidewalk to the door Pavers, flagstone or compacted decomposed granite with a stabilizer
    House frame Softens the foundation line and windows A narrow planting bed on drip, set back from the wall, topped with gravel
    Open field Fills the bulk of the yard One gravel or rock type, a few boulders, optional small turf panel
    Street edge Defines the property and handles foot traffic and car doors Durable rock or a paver band, no plants that hang over the curb

    Once zones exist, you can decide where water is allowed. In a typical easy-care plan, water reaches only the house frame and a few pockets in the open field. Everything else is hard surface or mineral cover that needs nothing from the irrigation system.

    Measure sun and shade before you decide

    Front yards that face south or west take the full force of the afternoon sun, and rock surfaces there hold heat into the evening. North-facing yards stay cooler and can hold frost longer in winter. Note where the house throws shade at different times of year; a planting pocket that is sunny in June may sit in shadow for much of January. Placing living elements where conditions are kindest means fewer replacements later.

    Gravel, decomposed granite or rock: picking the ground plane

    The ground plane is the material covering most of your front yard, and it sets both the look and the upkeep. In Arizona the main choices are crushed gravel, decomposed granite and larger river or cobble rock. Each behaves differently underfoot, under a rake and under a summer storm.

    Material Look Underfoot Upkeep notes
    Crushed gravel (about 3/4 inch) Clean, uniform, many color choices Firm enough for occasional walking Easy to rake level; needs edging so it does not spread
    Decomposed granite Soft, natural, matches local granite soils Packs down into a walkable surface Can track indoors if unstabilized; stabilized versions hold better on paths
    River rock or cobble Bold texture, good for accent bands Uneven, not for walking Leaves and debris settle between stones; best in small doses
    Mixed sizes in one area Natural wash look Varies Harder to clean; use deliberately rather than by accident

    For most front yards, one main material plus one accent material is plenty. A field of crushed gravel with a band of larger rock under the roof drip line, for example, looks intentional and gives rain from the eaves somewhere to land without splashing soil around.

    Depth matters more than people expect

    Gravel laid too thin lets soil show through within a season, and weeds follow. As a general guide, small gravel and decomposed granite look and perform best at roughly two to three inches deep, while larger decorative rock needs a little more to cover well. Spreading the right depth once is far cheaper than topping up thin areas every year.
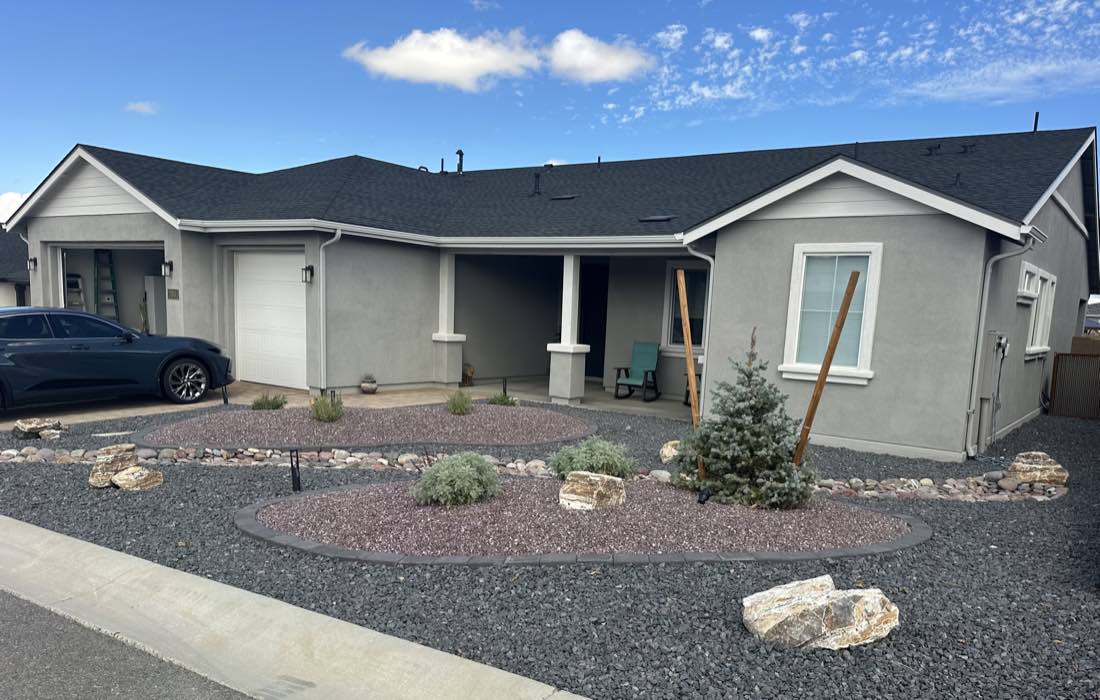
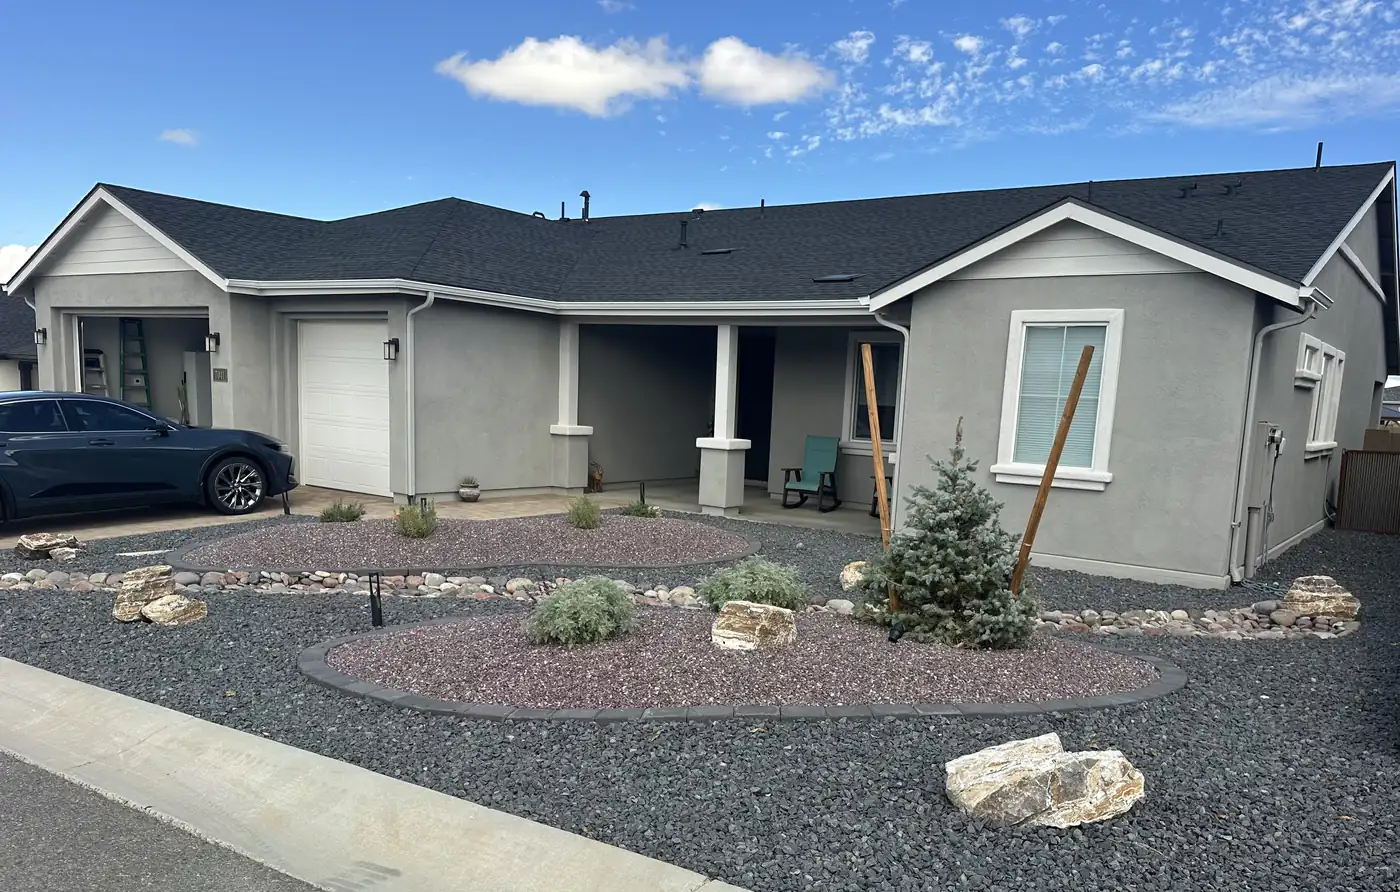
    Low maintenance front yard in Arizona with layered decorative rock, boulders and desert plants
    One main rock type, a few boulders and sparse planting keep this front yard tidy with little effort.

    Color choices that age well

    Very light rock can glare in strong sun and shows every leaf and drip of tire grime near the driveway. Very dark rock heats up quickly. Mid-tone browns, tans and muted reds tend to blend with the hills around Prescott and hide dust between rakes. Bring a few samples home and look at them in both morning and late-afternoon light before committing.

    Boulders and gentle grade changes that do the visual work

    A flat field of gravel reads as unfinished. Boulders, set in small groupings, give the eye somewhere to rest and make a front yard look designed rather than covered. Better still, a boulder needs no water, no trimming and no replacement.

    • Group in odd numbers. A cluster of three, with one clearly larger, looks more natural than a row of matching stones.
    • Bury them partly. A boulder sitting on top of the gravel looks dropped there. Setting the base below grade makes it look like it has always been part of the land.
    • Face the best side to the street. Most stones have a more interesting face; turn it toward the people who will see it.
    • Use them to solve problems. A boulder at a walkway corner stops shortcuts across the gravel; one near the driveway apron keeps tires off the planting bed.

    Low mounds, sometimes called berms, can also break up a flat lot and give a planting pocket a slight lift. Keep mounds gentle and wide so gravel stays put, and make sure they do not push water toward the house. If your front yard already has a real slope, a short low wall may hold it better than a mound; our retaining wall team can tell you which approach fits.

    An entry walkway that does the guiding

    A front walkway is the one part of the yard that gets used every single day, so it deserves the most durable material in the plan. When the path is obvious and comfortable, people stop cutting across gravel and planting beds, which keeps those areas neat without any extra effort from you.

    Width, shape and material

    A path that feels generous invites use. Many designers aim for roughly four feet so two people can walk side by side, narrowing for secondary paths to a side gate. Gentle curves are welcoming, but a path that wanders too much will be ignored; people take the shortest line to the door. Interlocking pavers, flagstone set on a compacted base and stabilized decomposed granite all work well. Pavers hold a crisp edge for years and are easy to repair one unit at a time, which is why many of the entry walks we build through our paver and hardscape service use them.
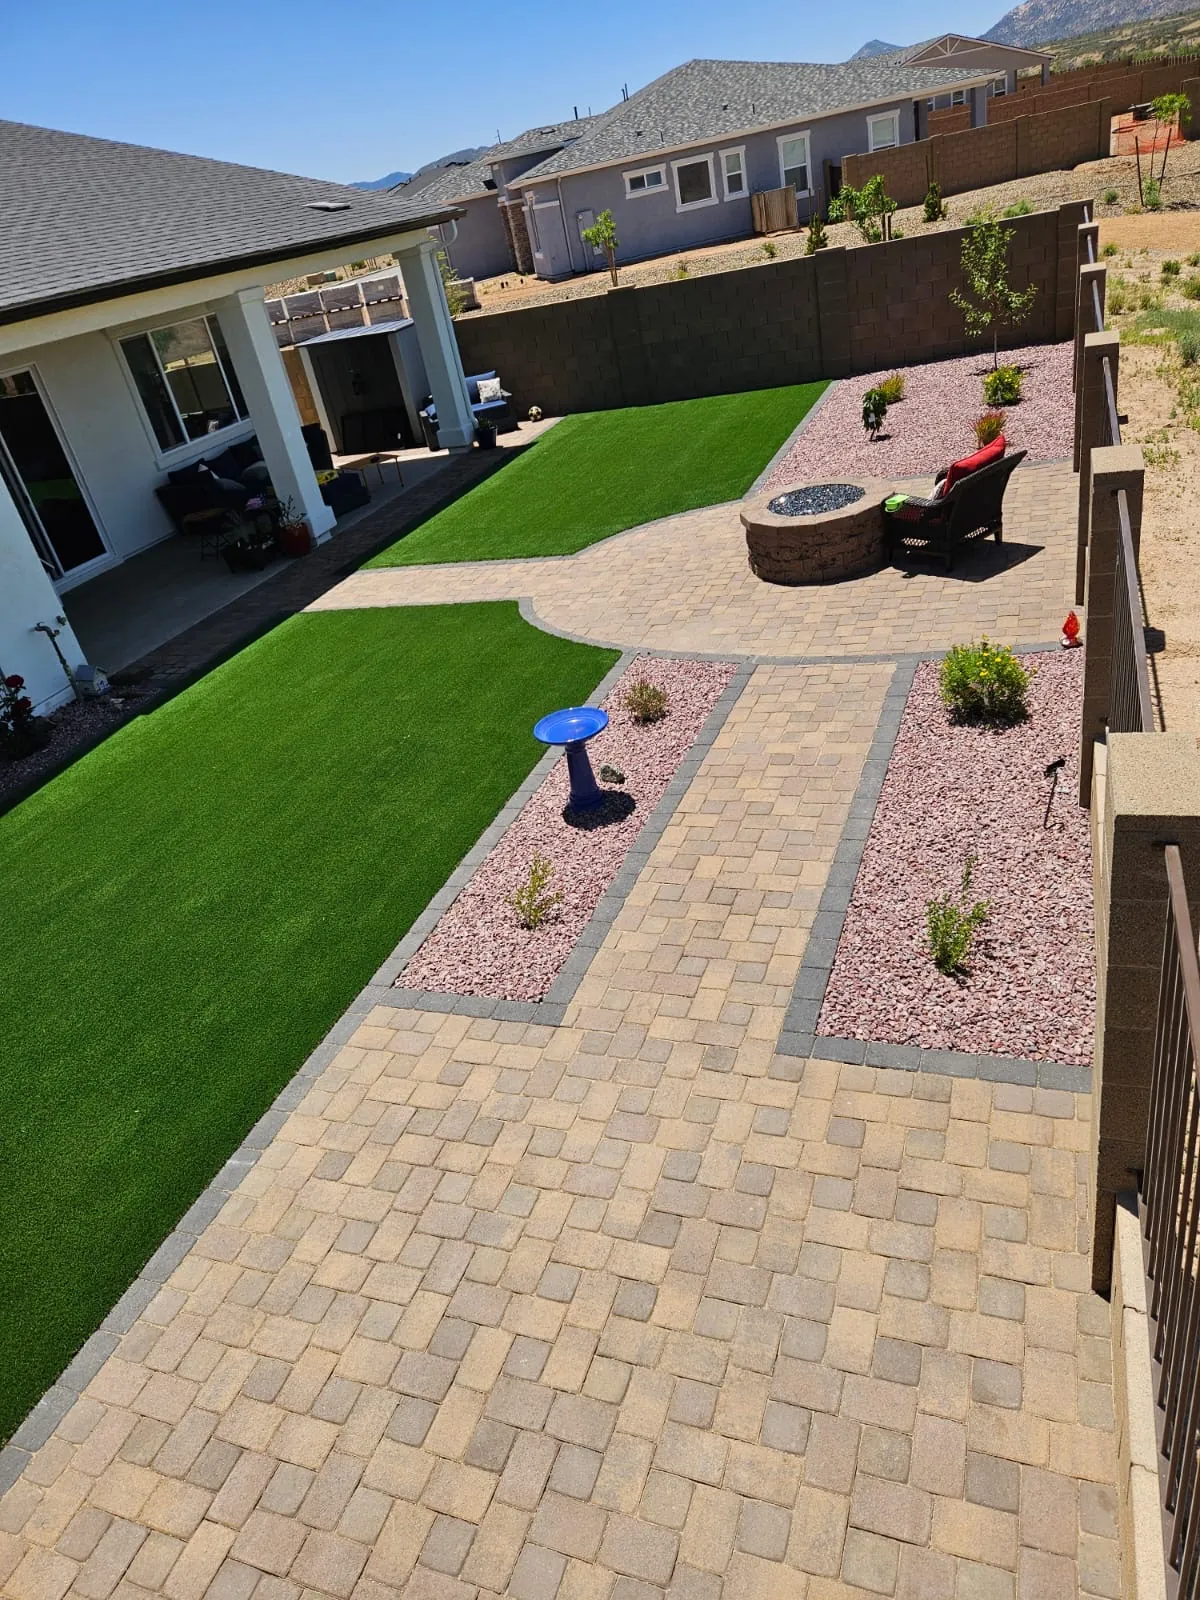
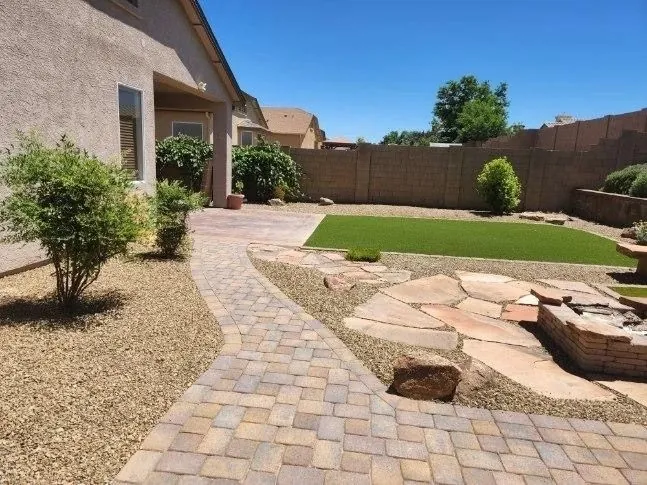
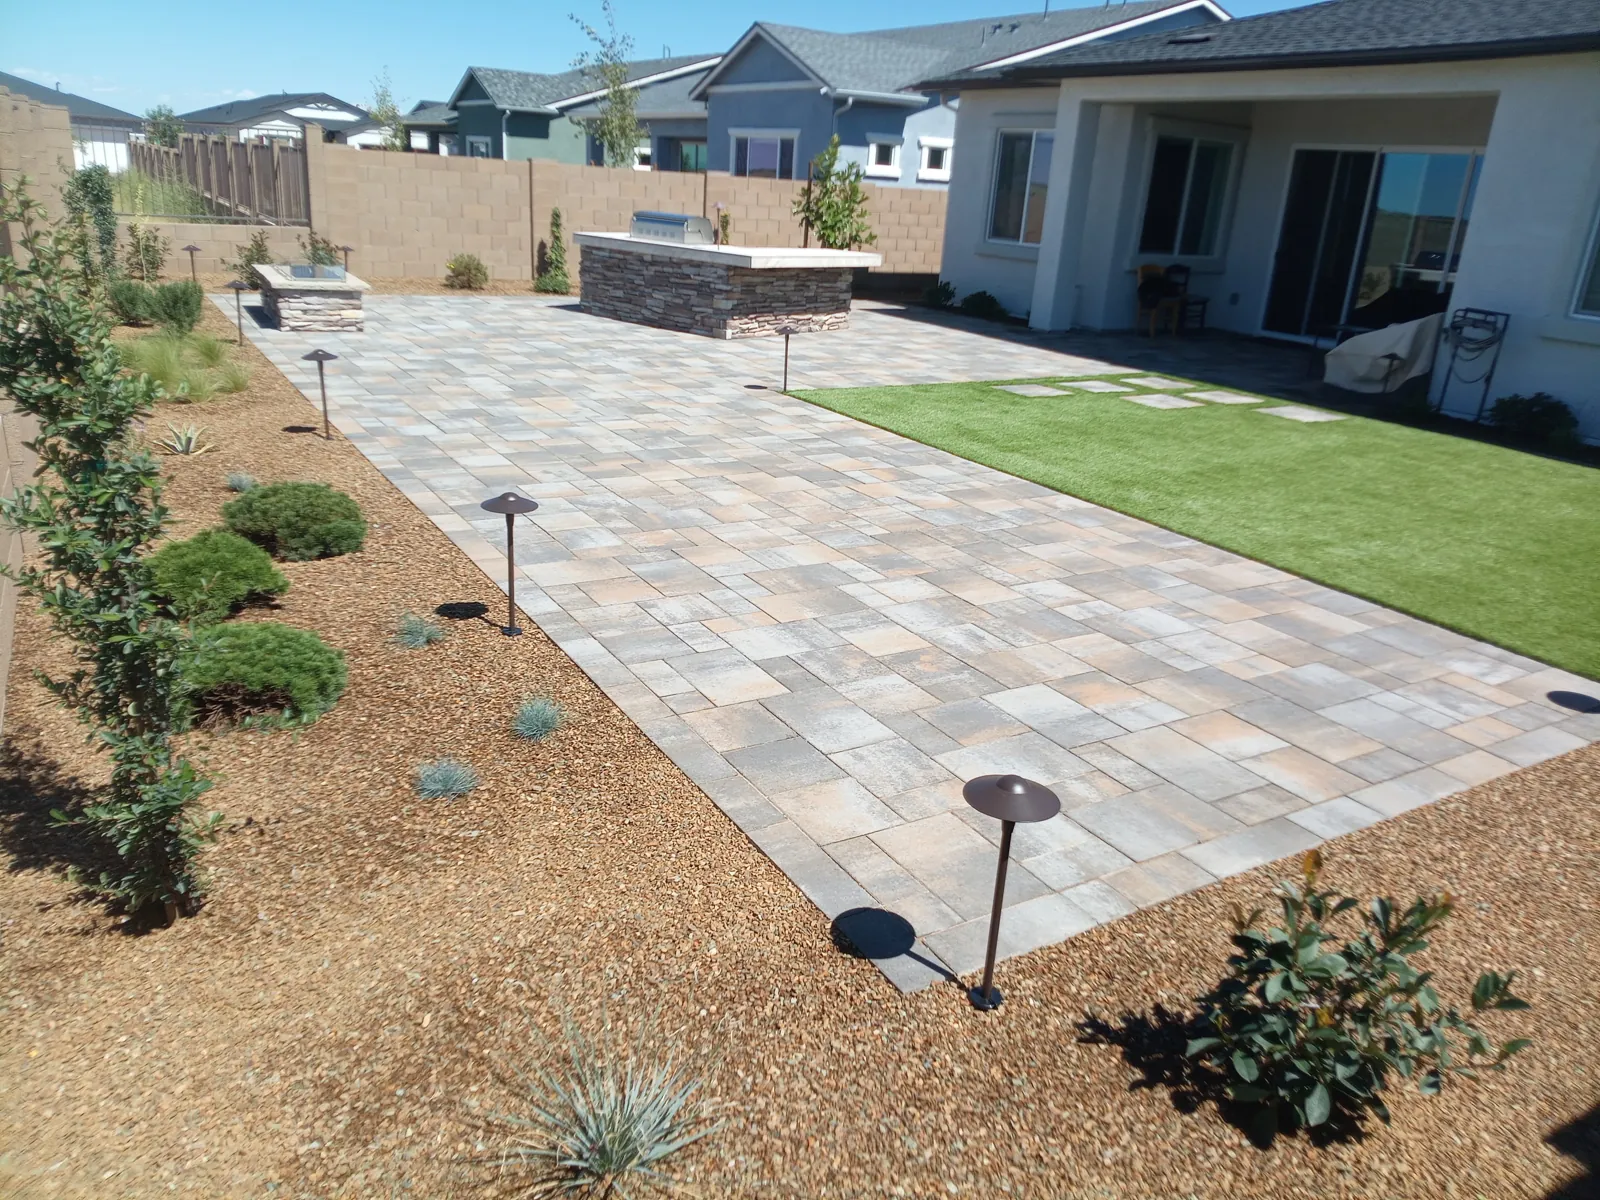
    Paver path running between artificial turf and gravel planters along an Arizona side yard
    A firm paver path gives everyone a clear route and keeps feet off gravel and planting areas.

    Lighting and the approach at night

    If your front door is approached after dark, plan for low path lighting before the walkway is built. Running conduit under the path during construction is simple; cutting it in later is not. Even a few fixtures at the steps and the turn toward the door make the approach safer and show off the yard in the evening.

    Mind the mailbox and the trash can route

    Two trips get forgotten in many front yard plans: the walk to the mailbox and the route for wheeling trash bins to the curb. Give both a firm surface. Bins rolled across loose gravel scatter it every week, and that is exactly the kind of small recurring chore a good layout removes.

    Where a small turf panel earns its place

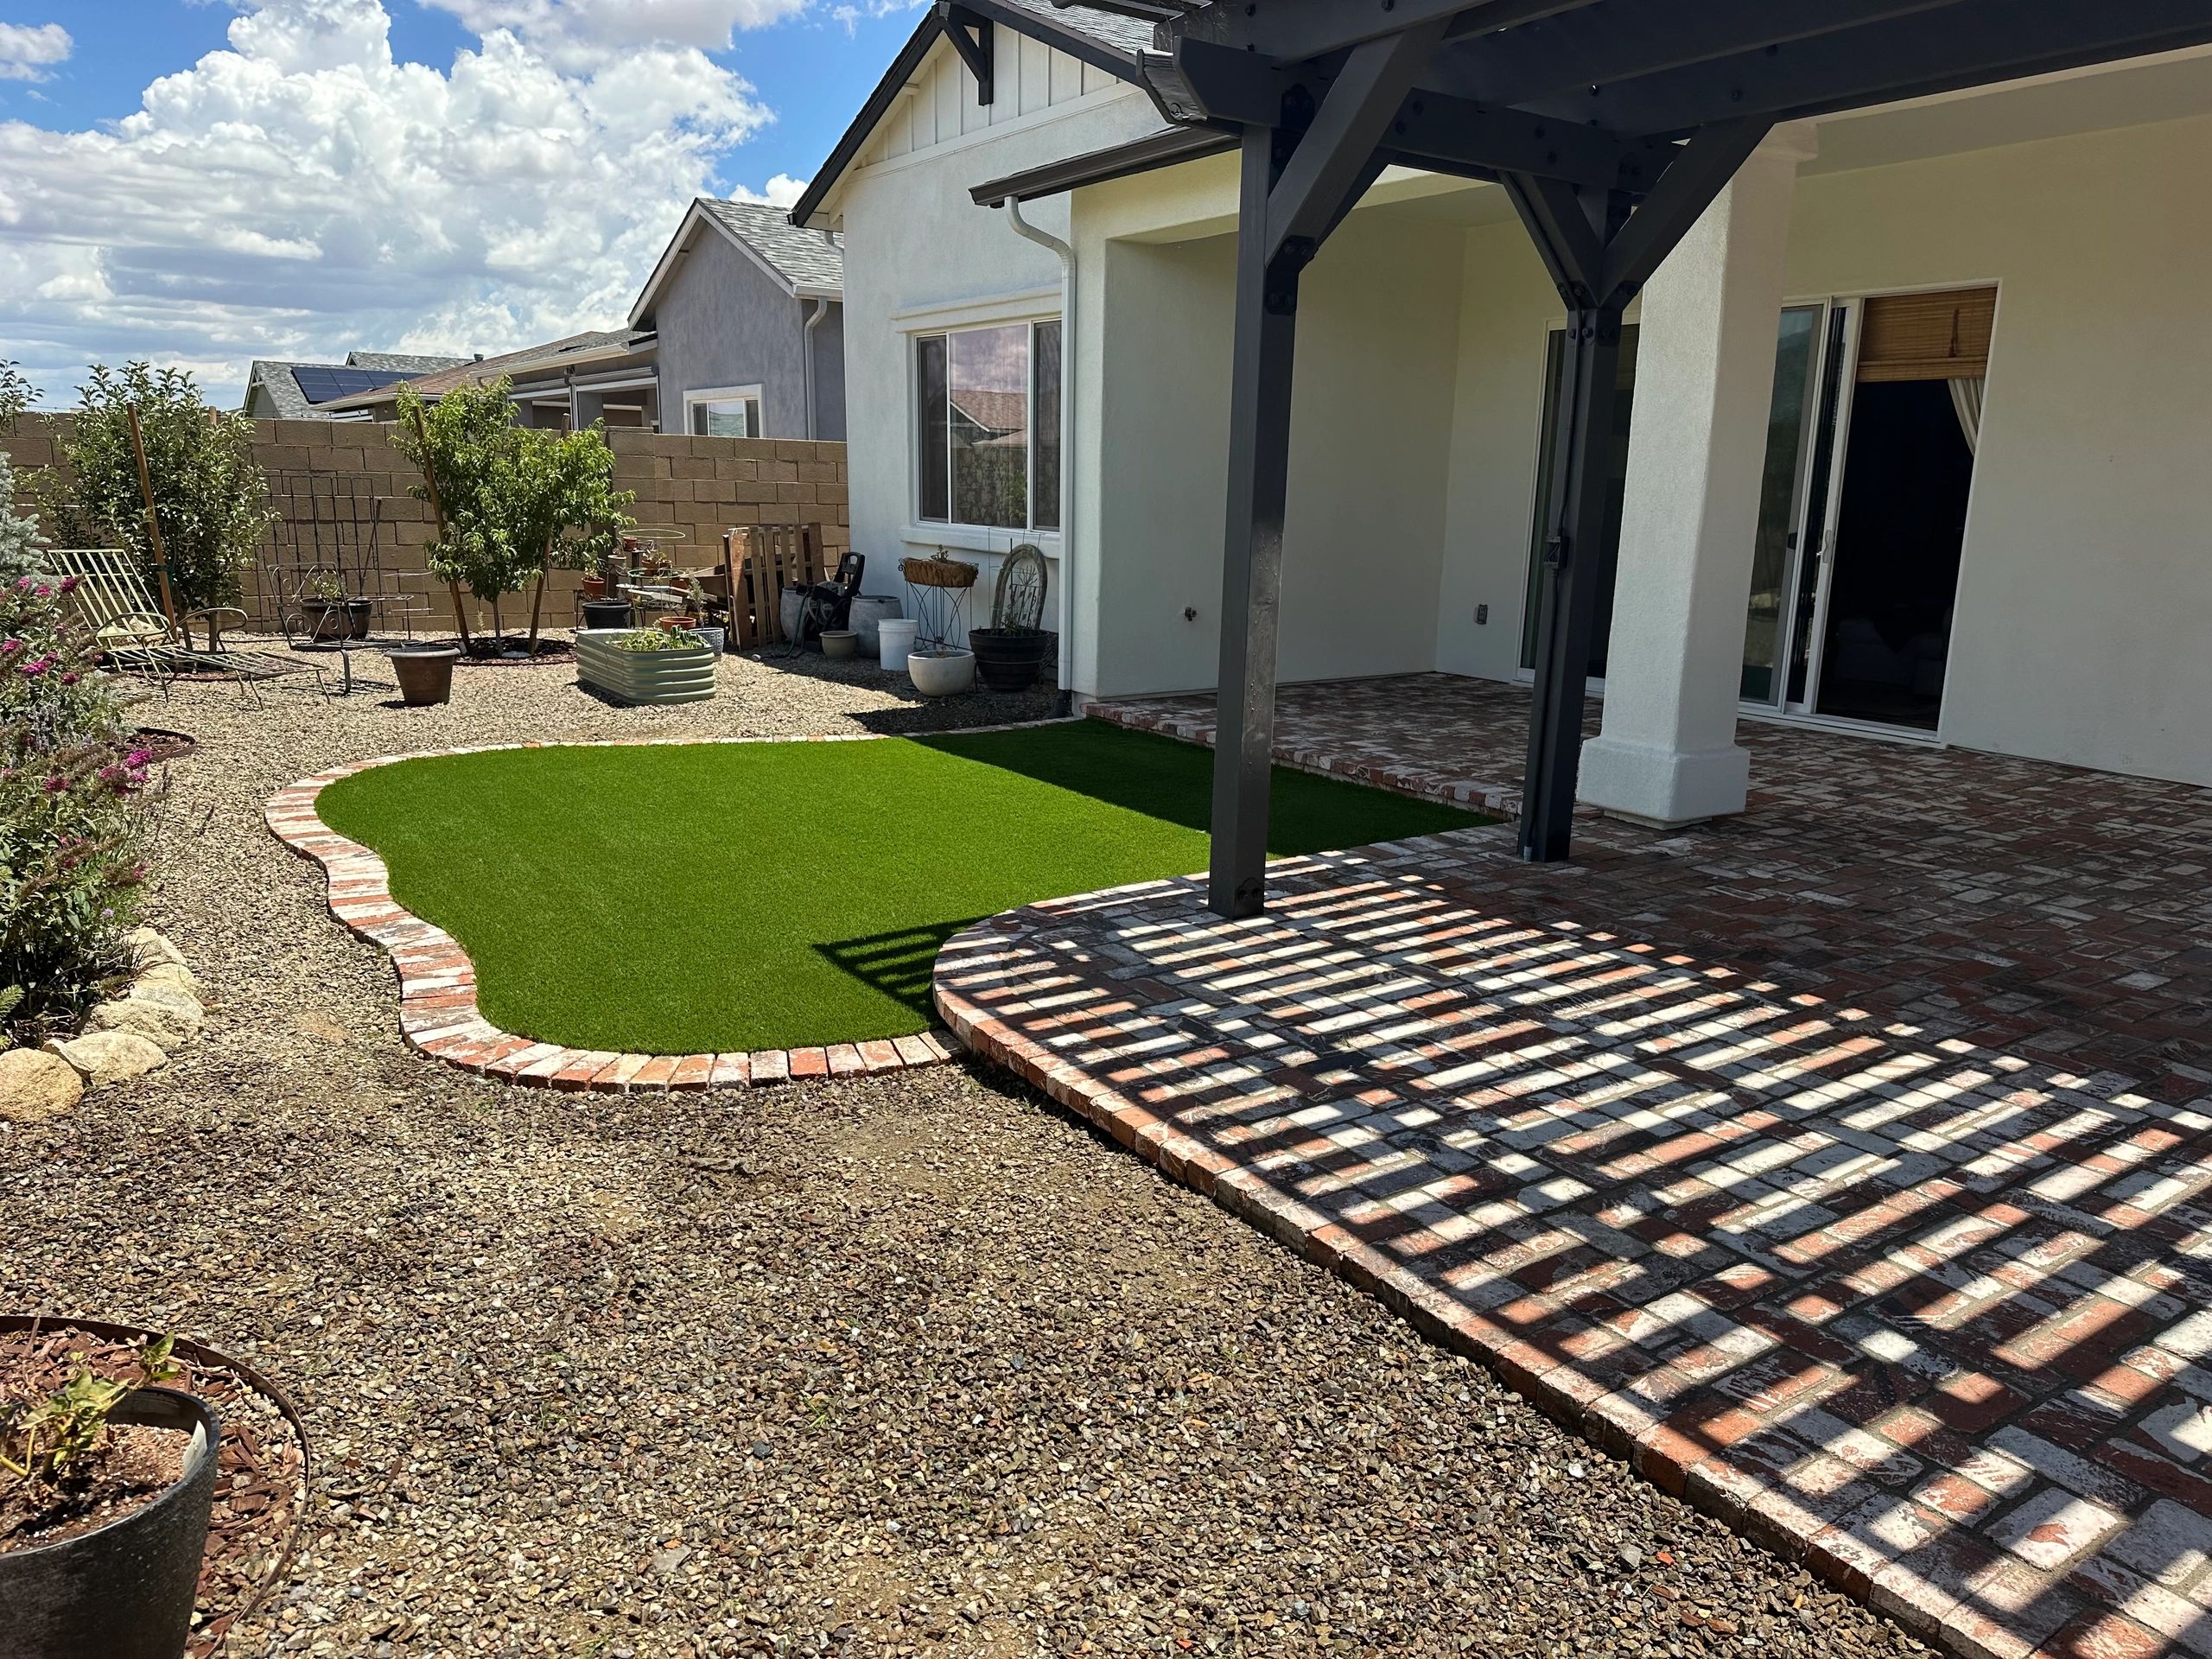
    Many families still want a patch of green out front, for kids, a dog or simply for contrast against the rock. The low-maintenance answer is to keep any turf area small, simple in outline and surrounded by a hard border. A rectangle or soft oval is easier to install and cleaner to keep than a shape with many tight curves.

    Synthetic turf removes mowing and watering from the list entirely, and modern products look convincingly natural. It still benefits from a periodic rinse and brushing, and in full afternoon sun the surface can get warm, so placement near shade or a north wall helps. Our artificial turf installation team can walk you through product choices and base preparation for your lot.
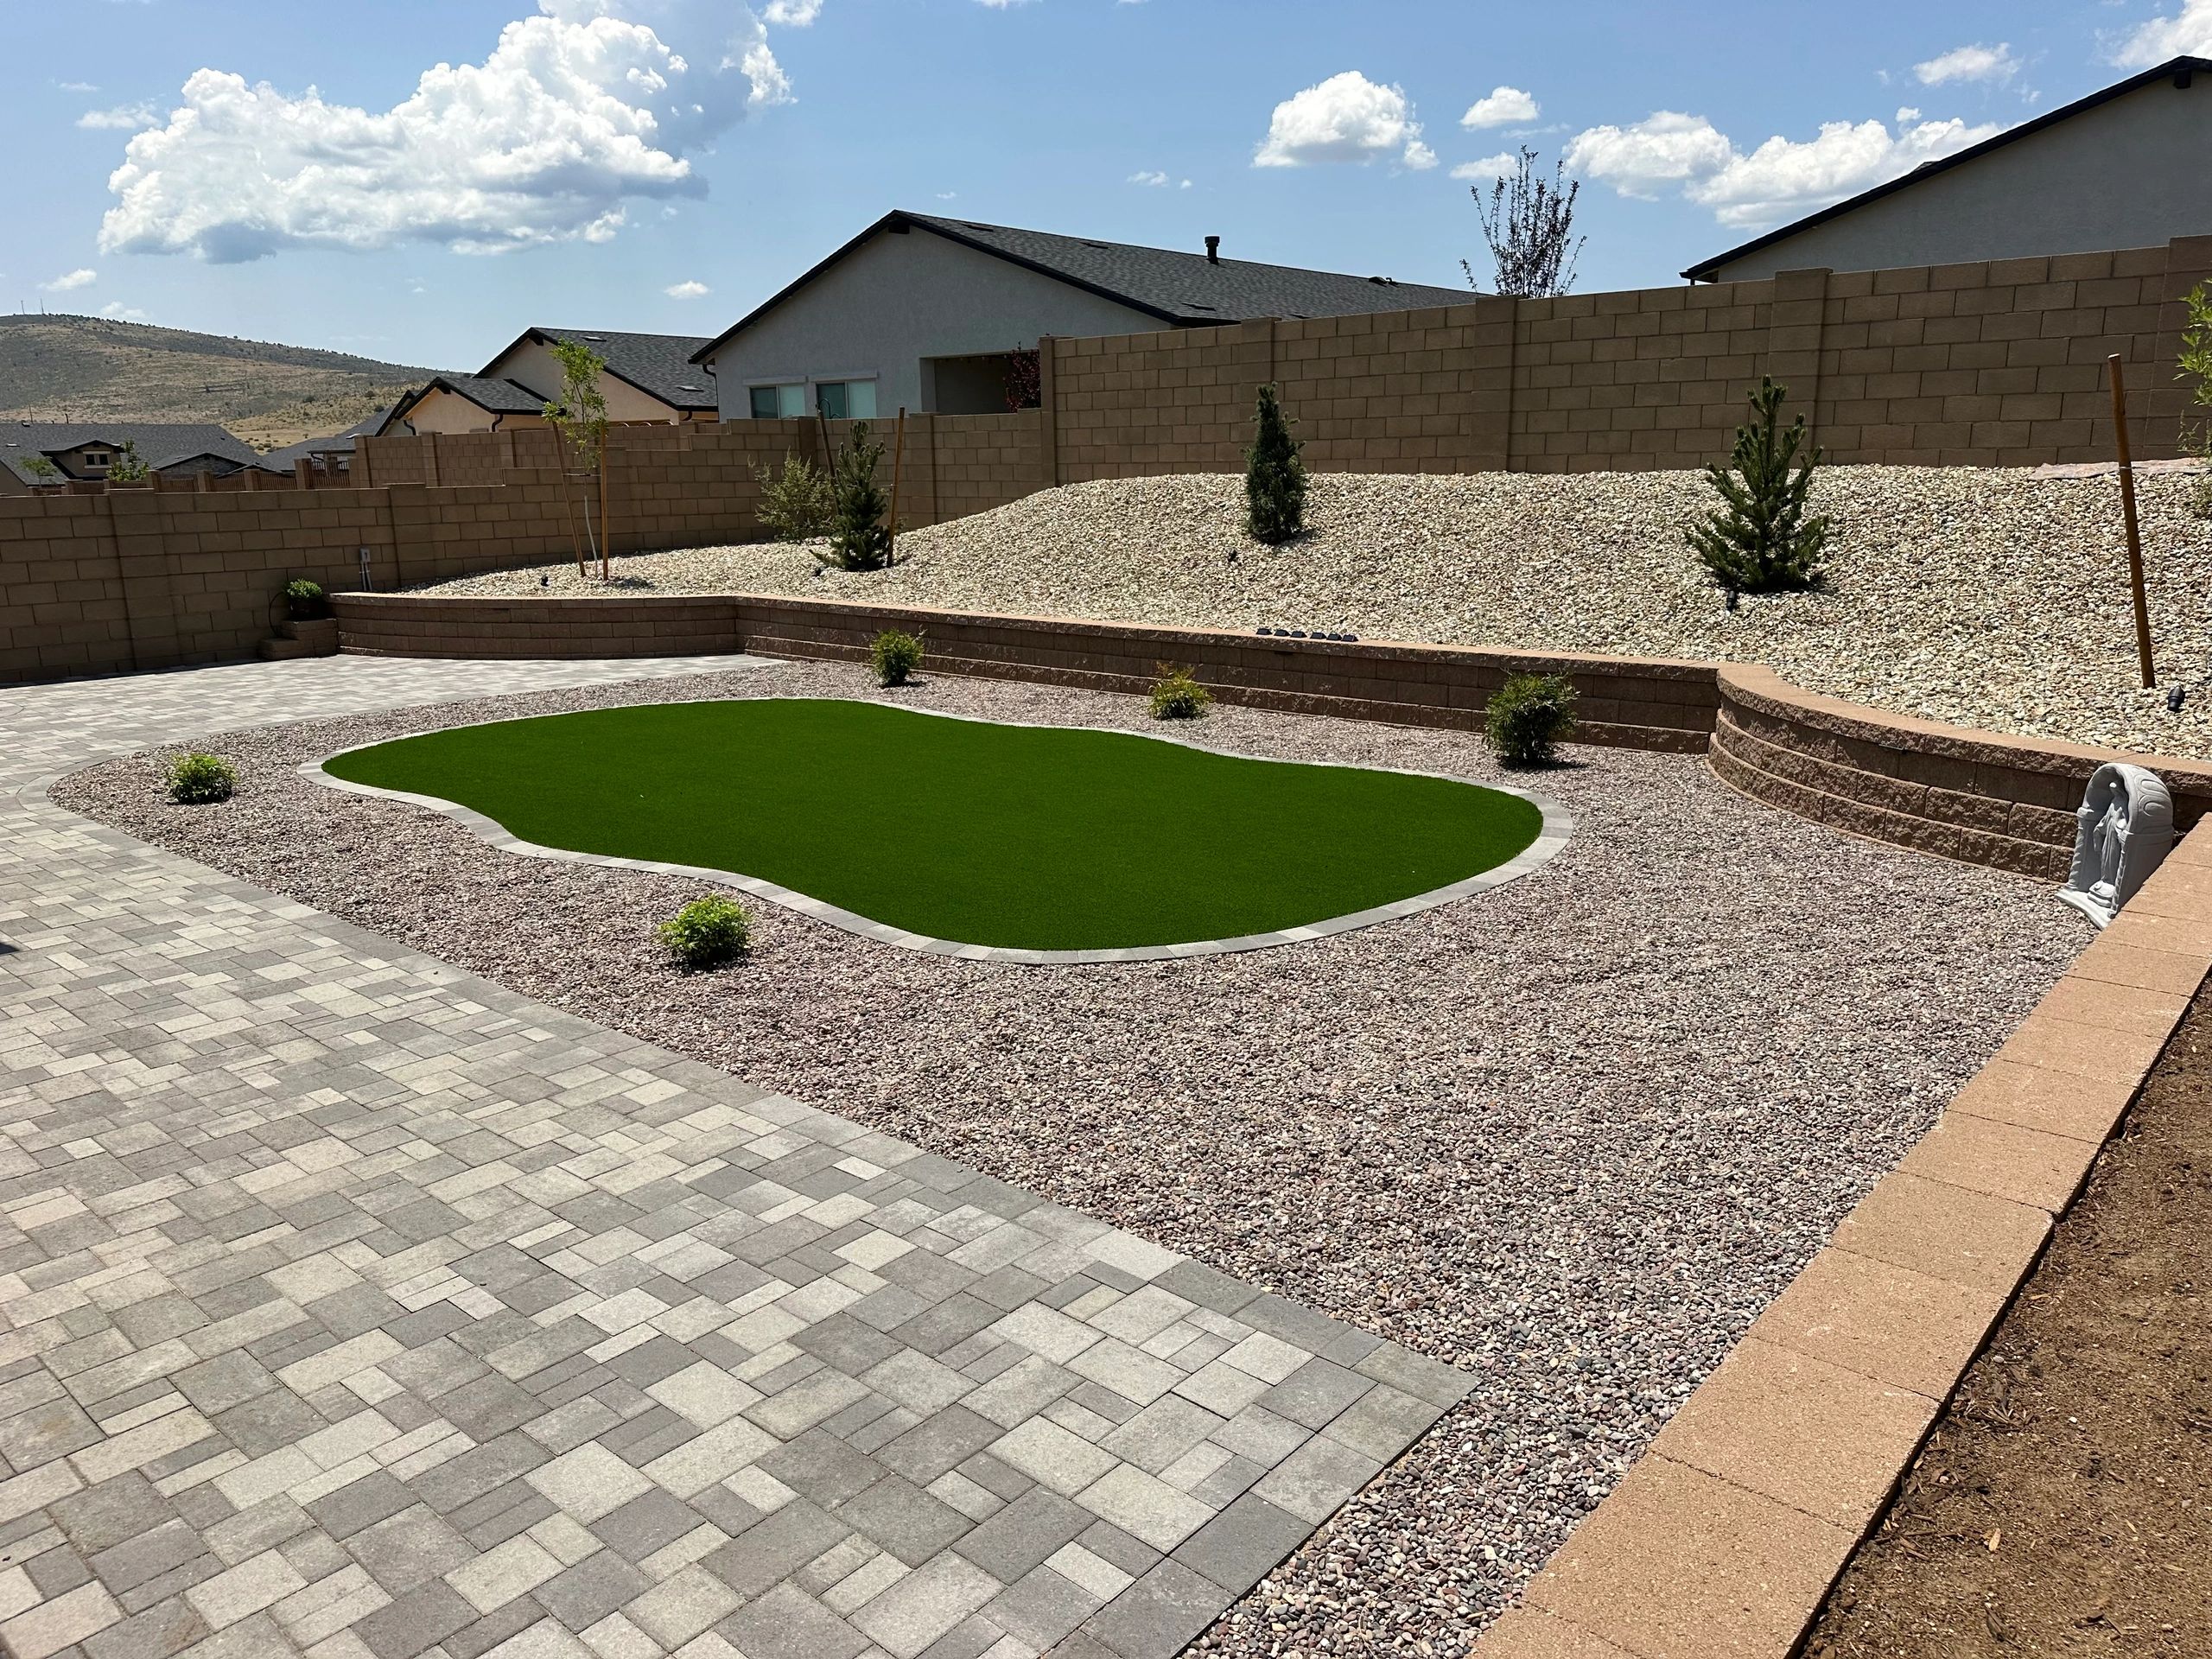
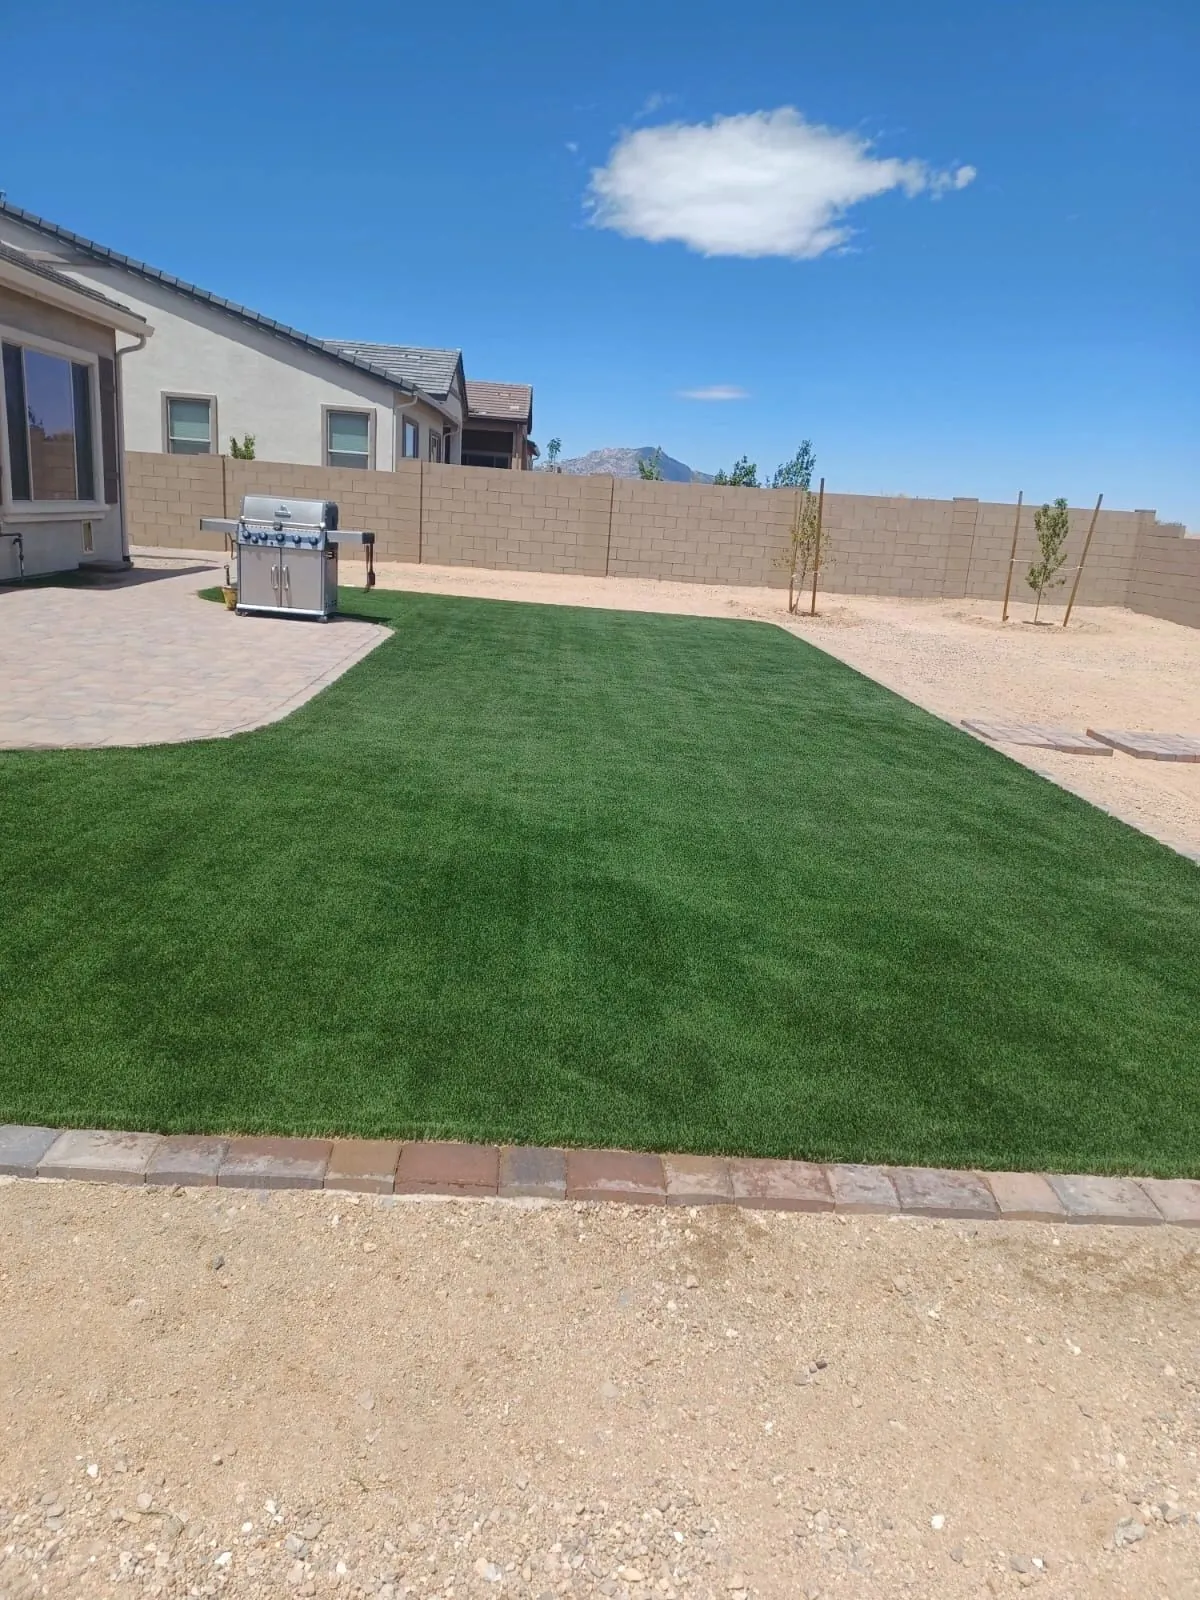
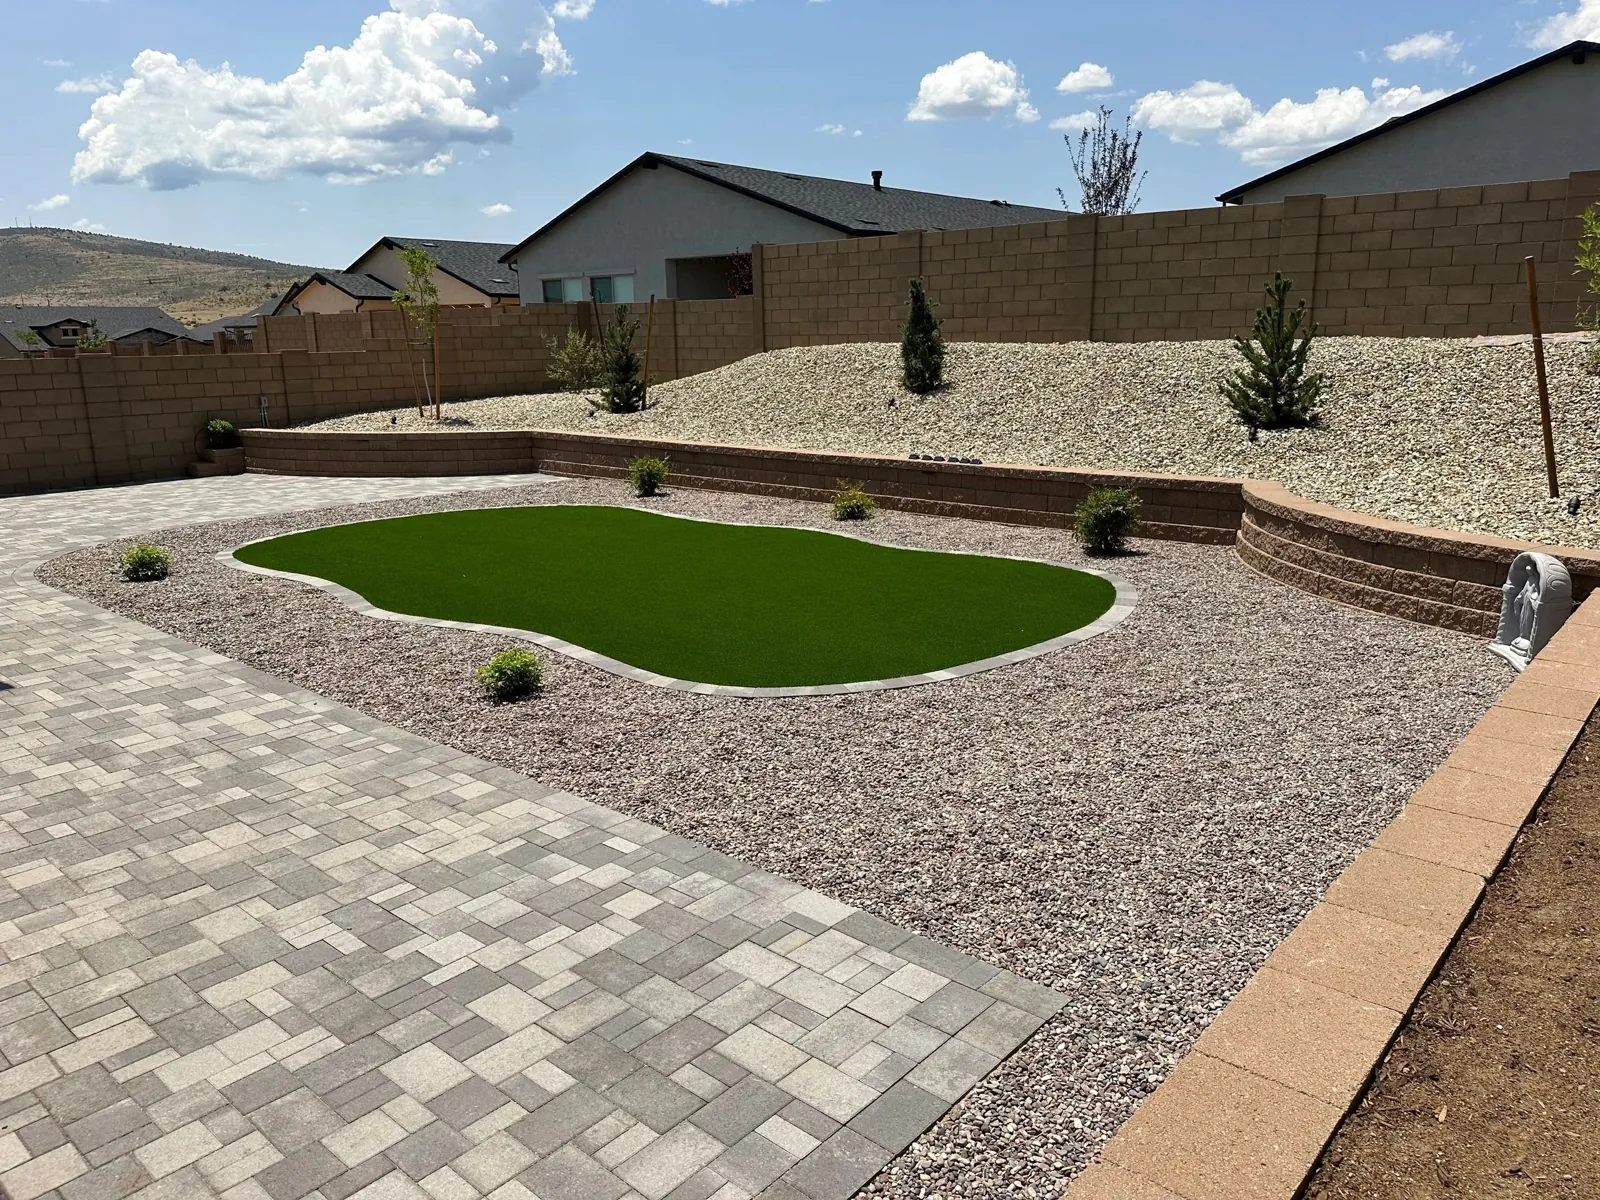
    Small synthetic turf panel installed as part of a low maintenance Arizona yard
    A compact turf panel adds green contrast without adding mowing or watering to the list.

    Separate turf from gravel with a hard edge

    Gravel that migrates onto turf gets kicked into the fibers and is tedious to pick out. A paver band, concrete curb or steel edge between the two surfaces solves that permanently and gives the turf a finished frame.

    Edging and weed control: the two jobs that decide your upkeep

    If there is one section of this guide to take seriously, it is this one. Most front yards that start out low maintenance and slowly become a chore fail in exactly two places: materials that migrate because nothing holds them, and weeds that move into every bare spot.

    Edging that actually holds

    • Steel or aluminum edging gives a thin, crisp line and holds gravel well when staked properly.
    • Concrete curbing is permanent and handles mower-free yards nicely, but it is hard to change later.
    • Paver or brick bands double as a decorative border and a mowing strip if you keep any living lawn.
    • Plastic roll edging is inexpensive but tends to heave and wander, especially through freeze and thaw cycles; it is usually a false economy.

    Whatever you choose, set the edge slightly above the gravel surface so rock does not spill over, and run it everywhere two materials meet.

    A realistic weed strategy

    No front yard in Arizona is weed-free forever; wind and birds deliver seed constantly. The trick is to stop most weeds before they sprout and pull the rest while they are tiny.

    1. Clear and prepare the soil well before any rock goes down. Existing perennial weeds should be removed, roots included.
    2. Decide on fabric deliberately. A quality permeable fabric under gravel can help in open areas, but it does not belong under planting pockets long term, and windblown soil can still settle on top of it over time.
    3. Use a pre-emergent product as labeled, typically timed before the main germination flushes. Follow the product label exactly and keep it away from areas where you intend to sow seed.
    4. Walk the yard after storms. Rain triggers germination. Pulling seedlings within a week or two of a good rain takes minutes; waiting a month takes an afternoon.

    If you would rather not think about any of this, a light seasonal visit from our yard maintenance crew in Prescott Valley covers weed checks, gravel raking and shrub shaping on a schedule.

    Drip zones and a controller that adjusts itself

    Even the most mineral-heavy front yard usually has some living plants, and how they are watered determines whether they thrive with no attention or demand constant fiddling. Drip irrigation delivers water directly to each root zone, keeps the gravel surface dry and wastes far less than spray heads, which also means fewer weeds sprouting in wet rock.

    Set up zones by need, not by location

    Group plants with similar water needs onto the same valve. A shrub that wants a deep drink once a week should not share a line with a succulent that prefers to dry out. Separating them is easy at installation and nearly impossible to fix without digging later. Our irrigation and xeriscaping team lays out zones this way on every project.

    Let the controller do the seasonal thinking

    A basic timer runs the same schedule all year, which overwaters in winter and can underwater in the dry weeks before the summer rains. A weather-based or soil-moisture controller adjusts automatically. The EPA’s WaterSense program labels irrigation controllers that meet its efficiency criteria, which is a useful filter when shopping. Pair a smart controller with a quick visual check of the emitters a few times a year and the system will largely run itself.

    Protect the lines during installation

    Drip tubing should be buried or covered beneath the gravel, not left lying on top where sun degrades it and rakes snag it. Before any trench is dug, contact Arizona 811 so buried utilities in the front yard are marked; this is especially important near the street, where service lines usually run.

    HOA rules and a phased budget

    Many planned neighborhoods in the area have homeowners associations, and front yards are the part of the property they care about most. Before you finalize a plan, read the architectural guidelines and find out whether a submittal is required. Common topics include the percentage of the yard that must be planted, approved rock colors, turf rules, boulder sizes and how close plants may be to the sidewalk. Getting approval on a clear drawing first avoids having to undo work later.

    Building in phases without making extra work

    A front yard does not have to be finished in one go. The key is to install things in an order that never requires tearing out what is already done.

    1. Phase one: grading, utilities and irrigation sleeves. Anything that runs underground goes in first, including conduit for future lighting.
    2. Phase two: walkway and edging. These define the layout and hold everything else in place.
    3. Phase three: boulders and ground cover. Large stones go in before gravel so the gravel can be fitted around them.
    4. Phase four: plants, turf panel and finishing touches. These are the easiest pieces to add or change over time.

    Laying out the full design at the start, even if you build it over a couple of seasons, keeps every phase pointing toward the same finished yard. If you want to see how completed projects come together, browse our project gallery.

    Low maintenance front yard mistakes to avoid

    Run through this checklist before signing off on any plan. Each item is a common reason an easy-care yard turns into a regular chore.

    • Spreading rock too thin, so soil and weeds show through within a year.
    • Skipping edging, or using flimsy edging that heaves in the cold.
    • Putting gravel right against the house siding without leaving a clean, inspectable band at the foundation.
    • Choosing a turf shape with lots of tight curves that are hard to install and trim.
    • Running one irrigation zone for every plant regardless of need.
    • Planting shrubs that will outgrow their space and need constant cutting back near walkways and windows.
    • Leaving no firm route for trash bins and mail trips.
    • Laying everything in a single flat plane with no boulders, mounds or focal point, which makes even a clean yard look unfinished.
    • Ignoring the HOA until after installation.
    • Letting drip tubing sit exposed on top of the rock.

    Avoiding these ten mistakes will do more for your long-term upkeep than any single material choice.

    Front yard notes from Prescott Valley to Chino Valley, Prescott and Dewey-Humboldt

    Front yards in our part of Yavapai County deal with conditions that low-desert advice does not always cover. At roughly 5,000 to 5,400 feet, homes in Prescott and Prescott Valley see real winter freezes, large swings between day and night temperatures, dry spring winds and heavy summer storms. That is why firm edging, deep enough gravel and a well-built walkway base matter so much here: materials that look fine in a mild climate can shift and heave after a few cold snaps.

    Lot sizes vary a lot across the area too. Many neighborhoods in Prescott Valley have compact front yards where a single walkway, a boulder grouping and a small planting bed make the whole statement. Out toward Chino Valley and Dewey-Humboldt, larger and more rural lots often benefit from defining a manageable “finished” area near the house and letting the outer acreage stay natural. For plant selection advice specific to the region, the Yavapai County office of the UArizona Cooperative Extension is a trusted local resource.

    Want a front yard that looks sharp and asks very little of you?

    We design and build easy-care front yards throughout the Prescott area and greater Yavapai County, from the first sketch to the final rake of gravel. Reach our office at (928) 848-0706 or tell us about your front yard to book a free estimate. We work under Arizona license ROC 336502 with bond and insurance in place; check the license yourself on the Arizona Registrar of Contractors site.

    Low Maintenance Front Yard FAQ

    How deep should decorative rock be in a front yard?

    Small crushed gravel and decomposed granite usually look and work best at about two to three inches deep. Larger decorative rock needs a bit more depth to cover the soil completely. Rock spread too thin lets dirt show through, invites weeds and soon needs topping up, so laying the full depth at installation saves money and effort over the life of the yard.

    Is landscape fabric worth using under gravel in Arizona?

    It can help in open gravel areas with no plants, because it slows weeds coming up from below and keeps rock from mixing into the soil. It is not a permanent fix, since windblown dust settles on top over time and seeds can sprout there. Avoid long-term fabric under planting pockets, where it can restrict roots and water.

    What size of turf panel makes sense in a small front yard?

    Keep it just large enough for how you will use it, such as a play spot, a place for a dog or simple green contrast. A compact rectangle or gentle oval usually looks best and is easiest to install and keep tidy. Surround it with a firm border so gravel cannot drift onto the fibers.

    Do I need HOA approval before changing my front yard?

    If your home is in an HOA community, most likely yes. Many associations require a drawing and material list before front yard work begins and set rules on rock colors, planted percentages and turf. Read your architectural guidelines first, submit a clear plan, and wait for written approval before any work or material deliveries start.

    How wide should a front walkway be?

    Around four feet is a comfortable width for a main entry walk because two people can walk side by side and the path looks proportionate to most homes. Secondary paths to a side gate or utility area can be narrower. If anyone in the household uses a wheelchair or walker, plan for extra width and gentle slopes.

    What edging keeps gravel out of the walkway and turf?

    Steel or aluminum edging, concrete curbing and paver bands all hold gravel reliably when they sit slightly above the rock surface. Thin plastic roll edging is cheaper but often lifts and shifts through winter freezes. Install edging wherever two materials meet, especially between gravel and walkways or turf.

    How can I make a rock front yard look less plain?

    Add structure rather than more rock. A grouping of partly buried boulders, a gentle mound, a clearly defined entry path and one accent band of contrasting stone give the eye places to land. A few well-placed plants in pockets near the house soften the look without adding much upkeep.

    How much time does a low maintenance front yard need each month?

    A well-planned front yard usually needs only occasional attention: pulling a few weeds after rain, a light rake of the gravel and a quick look at drip emitters. Shrubs may need shaping once or twice a year. Time depends on yard size and plant count, so keep living areas small if you want the lightest workload.

    Should front yard boulders be partly buried?

    Yes. Setting a boulder with its base below the finished grade makes it look natural and stable, as if it belongs to the land. A stone resting on top of the gravel looks placed and can shift. Turn the most attractive face toward the street and group stones in odd numbers for a relaxed, natural look.

    What should I build first if my front yard budget is limited?

    Start with what goes underground and what defines the layout: grading, irrigation sleeves, conduit for any future lighting, the main walkway and edging. Those pieces are hardest to add later. Boulders, ground cover, plants and a turf panel can follow in later phases without tearing out finished work.
  • Pavers vs Concrete Patio: Which Holds Up Better in Prescott?

    Pavers vs Concrete Patio: Which Holds Up Better in Prescott?

    For most backyards in Prescott and Prescott Valley, the pavers vs concrete patio question comes down to movement. Interlocking pavers flex with freeze-thaw cycles and can be lifted and reset one piece at a time, while a poured slab is cheaper to place but tends to crack as the ground shifts. Concrete still makes sense for simple, utilitarian spaces.

    Key takeaways

    • Individual concrete pavers are made far denser than typical residential poured concrete, but the finished patio is only as good as the base underneath it.
    • A slab is one rigid piece, so soil movement shows up as cracks. A paver surface is hundreds of small pieces with joints that let it move without breaking.
    • Paver repairs are local and nearly invisible; concrete repairs usually leave a patch that never quite matches.
    • Plain concrete usually costs less on day one. Pavers often earn their keep through easier repairs, design freedom and a longer useful look.
    • Our high-desert winters, with frost on many nights from late October into spring, punish any patio that was built on a weak or poorly compacted base.

    Pavers vs concrete patio at a glance

    Homeowners usually come to us with one of two pictures in mind. Some want the clean, continuous look of a smooth gray slab. Others have seen a neighbor’s patio laid in tan and charcoal blocks and like the texture. Both are built from cement, sand and aggregate, so the raw ingredients are close cousins. The real differences are in how each product is manufactured, how it is installed and how it behaves after a few winters on our hillsides.

    The table below sums up how the two options compare on the points that matter most in a high-elevation yard. We expand on every row further down.

    Factor Interlocking concrete pavers Poured concrete slab
    Unit strength Factory-made units meeting ASTM C936 average at least 8,000 psi Typical residential mixes run about 3,000 to 4,000 psi
    Response to soil movement Joints let the surface flex; individual pieces may shift but rarely break Rigid; movement tends to show as cracks, even with control joints
    Repairs Lift the affected pieces, fix the base, reset the same pavers Patch, grind or replace sections; patches usually show
    Design options Many shapes, colors, borders, inlays and curves Broom finish, exposed aggregate, color or stamping
    Ready to use Walkable right after installation Needs curing time before furniture and heavy loads
    Routine care Top up joint sand, occasional weed or debris control, optional sealing Fill cracks as they appear, optional sealing
    Upfront cost Usually higher than plain concrete Usually lower for a plain broom finish

    Neither column is a winner on every line. That is why we walk each client through how they actually plan to use the space, how the ground on their lot behaves and how long they intend to stay in the home before recommending a surface. If you would like to see how we approach that conversation, our landscape design service starts with exactly this kind of site walk.

    Why does Prescott’s climate change the answer?

    In Phoenix, a patio mostly fights heat. Up here, at roughly 5,400 feet, it fights cold, moisture and constant expansion and contraction. Prescott’s average freeze season runs from about late October to the first of May, and the gap between the daytime high and the overnight low averages close to 30 degrees Fahrenheit across the year. That means the top inch of soil and anything resting on it gets warmed and chilled again and again, sometimes in a single day.

    Water is the other half of the story. Much of our annual rain arrives in short, heavy summer storms, and winter brings snow that usually melts within days. Every melt and every storm pushes moisture into the ground under a patio. When that damp soil freezes, it can expand and lift whatever sits above it, a process known as frost heaving. When it thaws, the soil settles back, not always to the same place.

    A surface that cannot tolerate small, uneven movements will eventually show stress. That is the core reason so many high-desert contractors lean toward segmented paving for outdoor living areas. If you want the local forecast picture before you schedule any outdoor work, the National Weather Service office in Flagstaff covers the Prescott area and is worth bookmarking.

    Granite soils and mixed fill

    Many lots around Prescott sit on decomposed granite and rocky native soil, which compacts well when it is handled properly. New subdivisions, though, often have pockets of loose fill pushed around during grading. A patio poured over a soft pocket will settle unevenly there, and a slab cannot hide that. Pavers can still settle over a soft spot, but the fix is far less dramatic, as we explain below.

    Which is stronger, a paver or a slab?

    If you hold a single paver in one hand and a chunk broken off a patio slab in the other, the paver is almost always the denser, harder piece. Interlocking concrete pavers made to the ASTM C936 standard must average at least 8,000 psi in compressive strength. They are produced in a factory with a dry, low-water mix that is pressed and vibrated into molds, then cured under controlled conditions. That process leaves very little room for air voids and weak spots.

    Poured concrete for a residential patio is commonly ordered somewhere in the 3,000 to 4,000 psi range. It is mixed with more water so it can flow from the chute and be screeded and finished by hand. Weather on pour day, how long the crew waits before finishing, and how the slab is cured all influence the final quality. A well-placed slab is perfectly strong for foot traffic and patio furniture. It is simply more variable than a factory product.

    Strength of the piece versus strength of the system

    Here is the part that often gets lost in online comparisons: a paver patio does not rely on each block being strong on its own. It relies on the whole assembly working together. Compacted aggregate base, a thin bedding layer, the pavers themselves, sand locked into every joint and a solid edge restraint around the perimeter all share the load. Skip or shortcut any one of those layers and even the toughest pavers will rock, dip or spread apart. You can read more about the history and types of segmental surfaces on the paver flooring overview on Wikipedia.

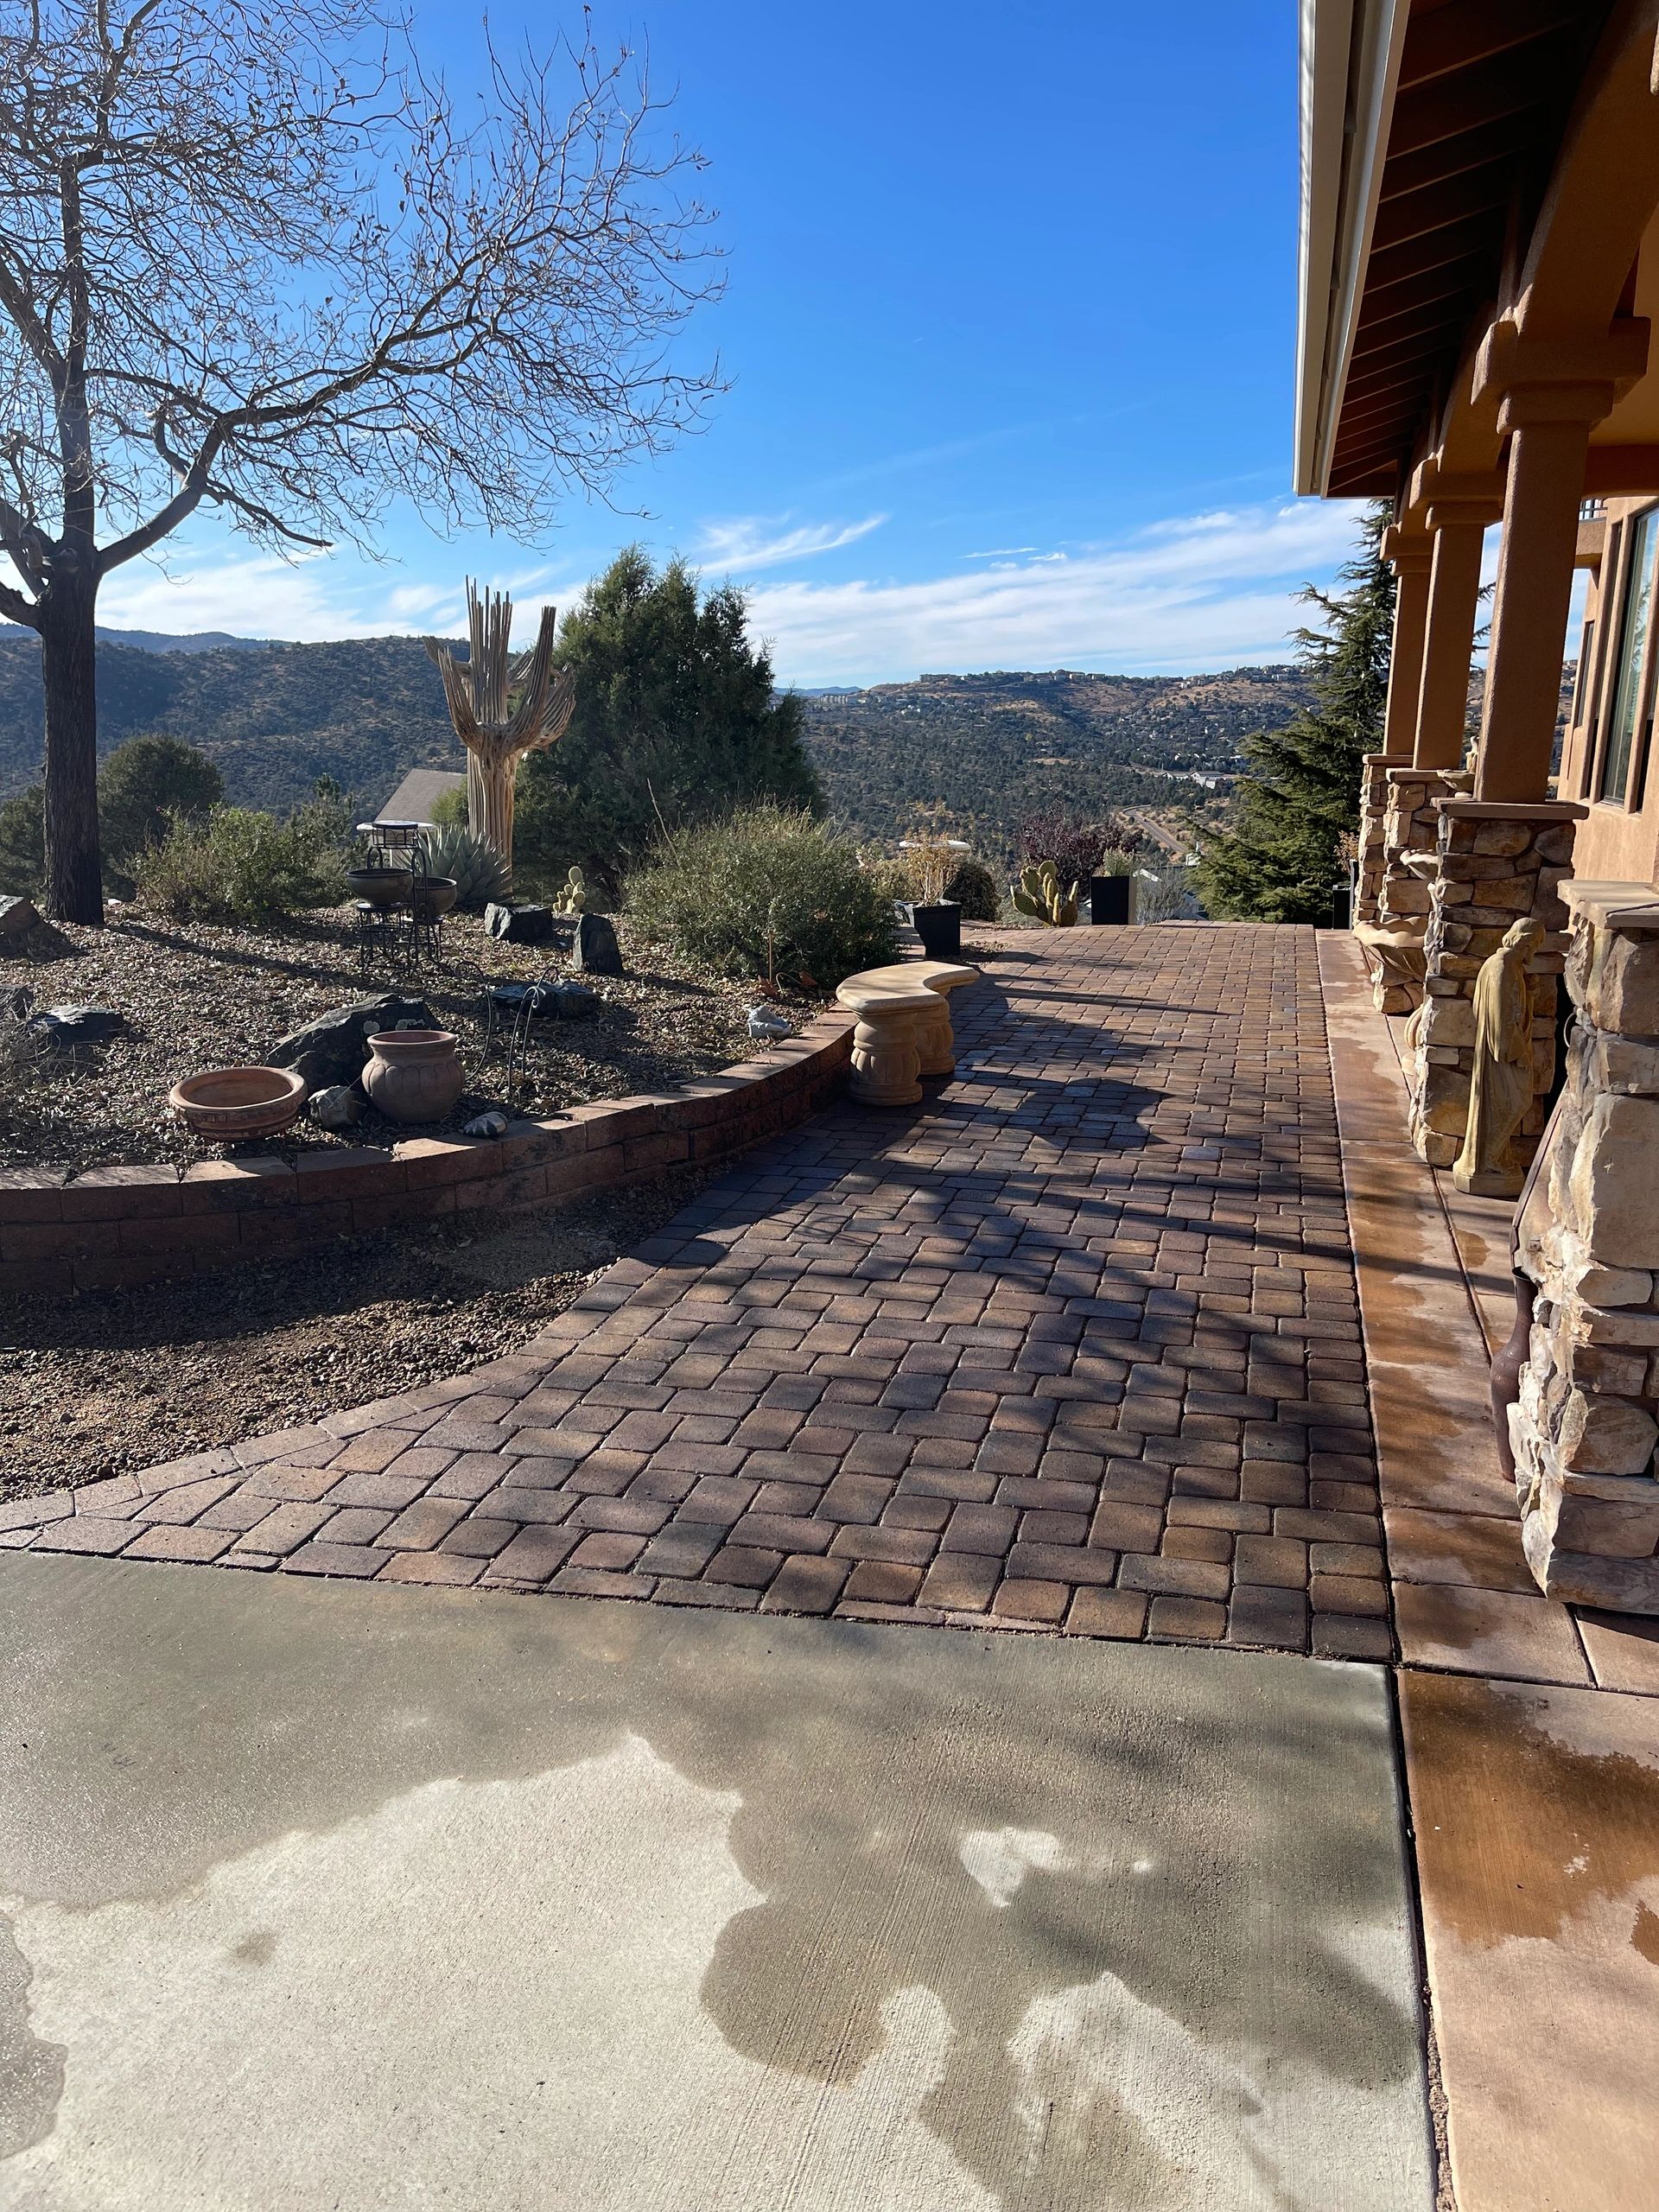
    Interlocking paver walkway with tight sand-filled joints, showing why pavers vs concrete patio choices favor flexible surfaces in Prescott
    Tight, sand-filled joints let a paver surface move slightly with the seasons instead of cracking.

    What happens when the ground moves?

    Concrete is strong when it is squeezed and comparatively weak when it is bent or pulled. A concrete slab is one continuous plate, so when one corner is pushed up by frost or another corner sinks into soft fill, the slab has to bend. Once the bending stress passes what the concrete can resist, it cracks. Installers cut or tool control joints into a slab to encourage those cracks to form in straight, tidy lines, but control joints guide cracking; they do not prevent it.

    A paver surface behaves differently. Every joint between blocks is a tiny hinge. When the base underneath shifts a little, the pavers above can tilt and follow it without any of them snapping. The joint sand keeps them locked side to side so the surface still feels solid underfoot. If the movement is large enough to create a noticeable dip, the pavers stay whole and can be lifted out and reset.

    Signs each surface is under stress

    • Concrete: hairline cracks that widen over time, one side of a crack sitting higher than the other, flaking or scaling on the surface, and gaps opening where the slab meets the house or steps.
    • Pavers: a low spot that holds water after rain, a few pieces that rock when stepped on, joints that have lost sand, or edge pavers drifting outward where the restraint has failed.

    Both sets of symptoms usually point back to the same root cause: water and a base that was not built for our conditions. The difference is how disruptive the fix is.

    Base preparation: the part nobody sees

    We tell every client the same thing. The finished surface is what you see, but the base is what you are really paying for. A patio, whether it is poured or laid, is only as stable as the ground and aggregate beneath it.

    What a sound paver base includes

    1. Locate utilities first. State law says a locate request must go to Arizona 811 before any excavation, with a minimum notice of two working days, and we never skip it.
    2. Excavate below organic material and any loose topsoil until we reach firm native ground.
    3. Compact the subgrade so the soil underneath will not keep settling after the patio is in place.
    4. Install and compact crushed aggregate in lifts, building the base up in layers rather than dumping it all at once.
    5. Set a slight pitch away from the house so rain and snowmelt run off the surface instead of pooling.
    6. Screed a thin, even bedding layer to seat the pavers.
    7. Lay the pavers, install edge restraint and compact the field, then sweep jointing sand in until the joints are full.

    What a sound slab base includes

    A poured patio also needs a compacted subgrade and a granular base, proper forms, reinforcement where the design calls for it, and control joints at sensible spacing. Concrete is far less forgiving of a rushed base because problems cannot be corrected after the pour. Once it hardens, any soft spot underneath is locked in until the slab cracks over it.

    On sloped lots, a patio is often paired with a wall that creates a level pad. When that is the case, the wall and patio should be planned together. Our retaining wall work is regularly built alongside new paver patios for exactly this reason.

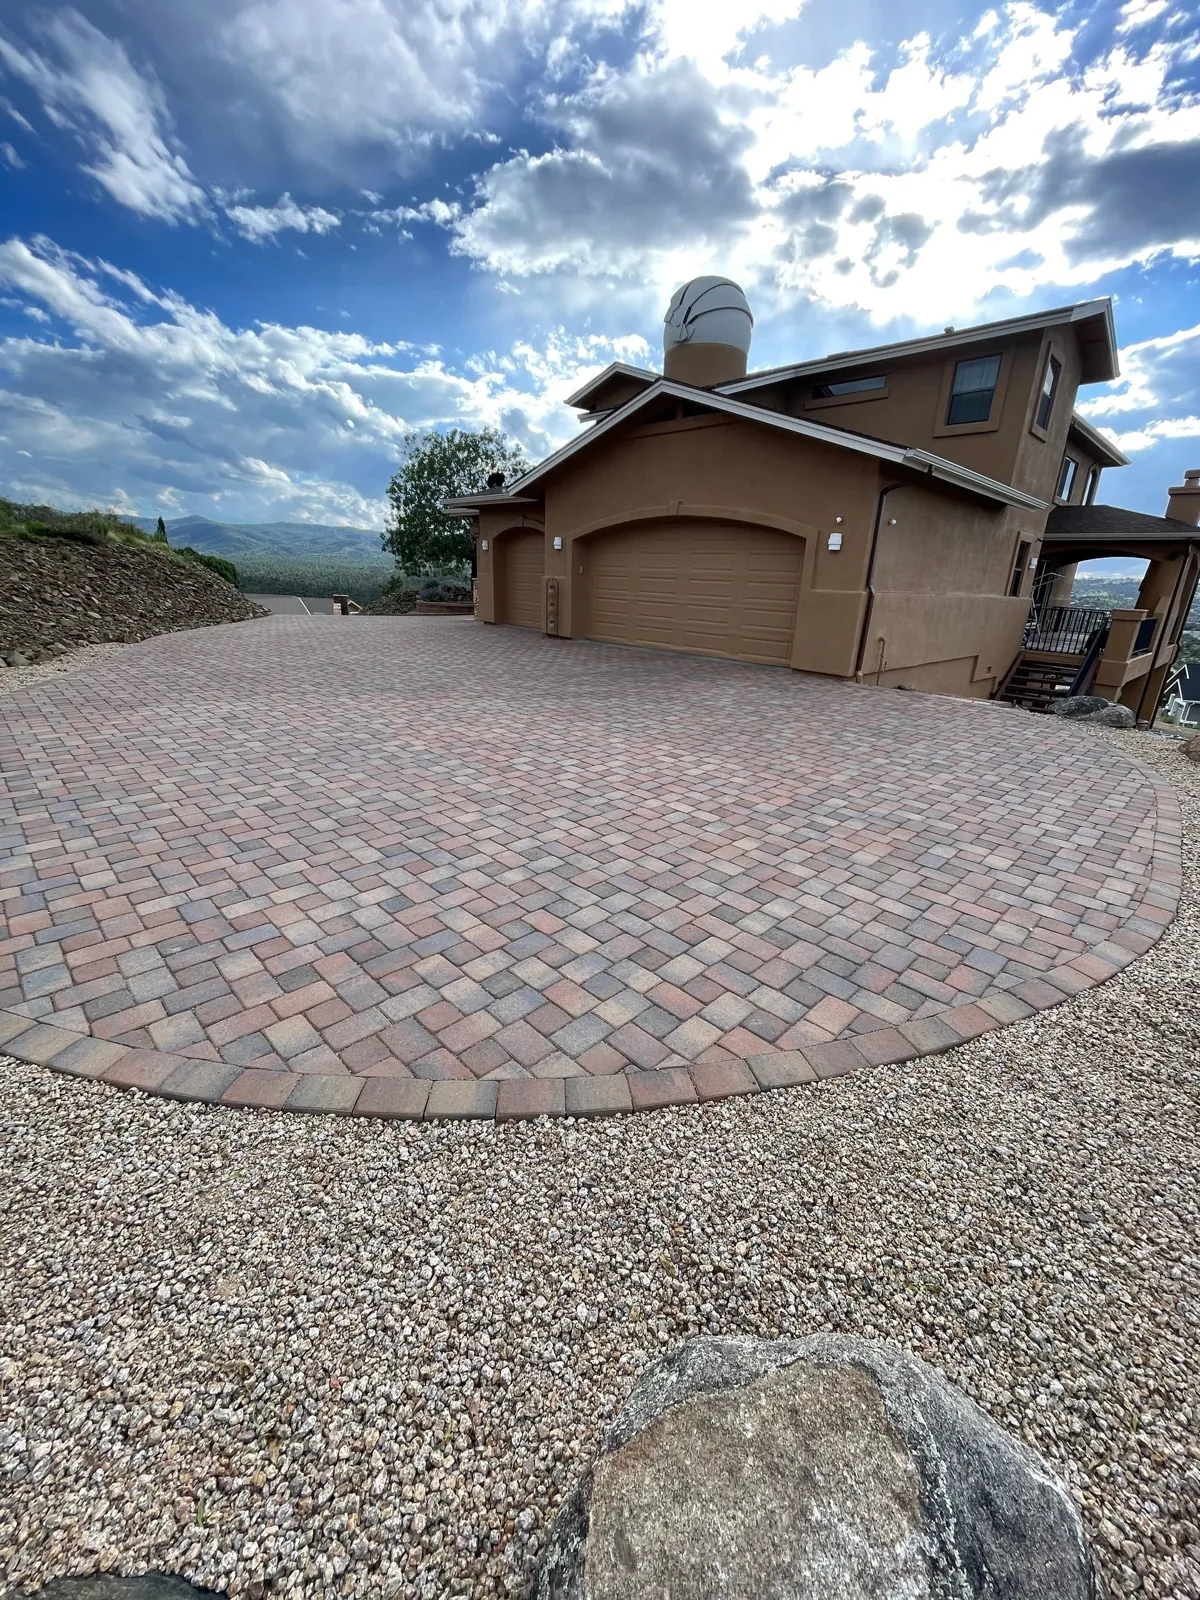
    Paver driveway court with a circular inlay built on a compacted aggregate base in Prescott Valley
    A properly compacted base lets pavers carry far more than foot traffic, including vehicles on a driveway court.

    Repairs and long-term upkeep compared

    Every outdoor surface needs some attention over its life. The question is what kind of attention and how often.

    Living with a paver patio

    With pavers, routine care is mostly about the joints. Wind, heavy rain and sweeping can pull sand out over time, so topping it up every so often keeps the interlock tight. Polymeric jointing sand, which hardens after it is misted with water, reduces washout and makes it harder for weeds and ants to settle in. Some owners choose to seal their pavers to deepen the color and make spills easier to clean; others leave them natural. Both are reasonable choices.

    When something does go wrong, such as a dip caused by a broken irrigation line or a tree root, the repair is surgical. We pull up the affected pavers, correct the base, and put the very same pieces back. Done well, you cannot tell afterward where the work happened. That is the single biggest practical advantage pavers have over a slab.

    Living with a concrete patio

    A slab asks for very little day to day. Sweep it, rinse it, and occasionally clean stains. Over the years, the main job is watching for cracks and sealing them before water gets in, because water entering a crack and freezing will widen it. Sealing the whole surface can also help it resist moisture and staining.

    Major repairs are where concrete gets harder. A sunken or heaved section usually has to be cut out and repoured, or lifted with specialized equipment. New concrete rarely matches the color and texture of the old, so the repair stays visible. Stamped and colored slabs are even harder to match.

    Seasonal upkeep checklist for either surface

    • After the summer storm season, look for low spots, puddles or washed-out joints.
    • Before the first hard freeze, clear leaves and debris so moisture does not sit on the surface all winter.
    • Use a plastic shovel for snow so you do not chip edges or scrape the finish.
    • Choose ice melt carefully and use it sparingly; read the label for products labeled safe for concrete and masonry.
    • In spring, check edges, steps and the line where the patio meets the house for gaps or movement.

    If you would rather hand this off, our yard maintenance team can keep an eye on hardscape along with the rest of the property.

    Looks, heat, glare and traction

    Design is where pavers pull furthest ahead. They come in a wide range of shapes, sizes, colors and textures, from tumbled blocks that feel old-world to large, crisp slabs with a modern profile. Borders, banding, circular inlays and gentle curves are straightforward to build. They also pair naturally with other materials we use every day, such as artificial turf, gravel beds and natural flagstone.

    Concrete can be dressed up as well. A broom finish gives grip, exposed aggregate shows off the stone in the mix, integral color tints the whole slab, and stamping presses patterns into the surface to mimic stone or brick. Stamped concrete is still a single slab, though, so it shares the same cracking behavior as plain concrete, and a crack running through a faux-stone pattern is hard to disguise.

    How hot does each surface get?

    Prescott summers are milder than the valley below, with only a few dozen days a year reaching 90 degrees, but a sunny patio still warms up quickly at this elevation. Color matters more than material here. Light tan, buff and gray surfaces reflect more sunlight and stay noticeably more comfortable underfoot than dark charcoal or deep red ones, whether they are pavers or concrete. Very bright, smooth white concrete can create glare, so many people prefer a warmer, mid-tone color.

    Traction in wet and icy weather

    Pavers have a slightly textured face and many small joints, which helps with grip after a monsoon shower or a light dusting of snow. Smooth troweled concrete can be slick when wet, which is why outdoor slabs are normally broom finished. With either surface, shaded spots that stay icy after a winter storm deserve extra care.

    Curving paver walkway with flagstone accents in a Prescott backyard, showing paver design flexibility
    Curves and mixed materials are simple with pavers and much harder to achieve with a poured slab.

    What drives the cost of each surface?

    We do not publish a per-square-foot price, because no two yards are alike and a number pulled from a national website rarely reflects what happens on a sloped, rocky lot in Yavapai County. What we can share is what moves the price up or down so you can compare quotes on equal terms.

    Factors that affect both options

    • Access: whether equipment can reach the backyard or materials must be moved by hand through a side gate.
    • Excavation and grading: rocky ground, slopes and old concrete or debris to haul away all add time.
    • Base depth: softer soils and areas that will carry heavier loads need more aggregate.
    • Size and shape: curves, steps and multiple levels take longer than a simple rectangle.
    • Add-ons: seat walls, fire features, lighting conduit and drainage details built in during construction.

    Factors specific to pavers

    Paver cost depends heavily on the product chosen, the laying pattern and the amount of cutting required. Herringbone patterns and curved borders mean more cuts and more labor. In exchange, there is no curing period, no risk of a bad pour day and no need to bring in a concrete truck.

    Factors specific to concrete

    A plain broom-finished slab is usually the lowest upfront cost of any permanent patio. Decorative finishes, colors and stamping add cost quickly, and stamped work can approach the price of pavers while keeping the cracking risk of a slab.

    When you compare bids, ask each contractor how deep the base will be, how it will be compacted, how the edges will be restrained or formed, and who holds the license. You can verify any Arizona contractor’s license status through the Arizona Registrar of Contractors. Ours is ROC 336502.

    When is concrete the better pick?

    We install a lot of pavers, but we are honest about where a slab is the sensible choice. Concrete tends to make sense in these situations:

    • A purely practical surface such as a trash-can pad, an equipment pad or a utility side yard where appearance does not matter.
    • A very tight budget where the priority is getting a hard, usable surface down now.
    • Matching an existing slab, such as extending a covered patio poured by the home builder.
    • Spots where a perfectly continuous, joint-free surface is needed, for example under certain equipment.

    For outdoor living spaces where people gather, cook and relax, especially those with a fire pit, pergola or outdoor kitchen, pavers usually deliver a better long-term result in our climate. Many homeowners end up with a mix: concrete where it is purely functional and pavers where they spend their evenings.

    Can you combine both?

    Yes, and it is common. A paver border around an existing slab can soften its look and tie it into a new patio extension. In some cases, pavers can even be installed over a sound existing slab, which we cover in the FAQ below. Our paver and hardscaping page shows the range of projects we build.

    Choosing a patio surface in our part of Yavapai County

    Each part of our service area brings its own soil, slope and wind, and those differences shape how a patio should be built.

    • Prescott: higher elevation, more shade from mature trees and more sloped lots. Shaded patios stay damp and icy longer in winter, so base quality and drainage pitch are critical.
    • Prescott Valley: many newer homes with builder-poured slabs and block-wall backyards. Extending or wrapping those slabs with pavers is one of our most frequent requests.
    • Chino Valley: larger, more open lots where big patios and long walkways are common, and wind can strip joint sand from exposed areas.
    • Dewey-Humboldt: rural properties where practical, durable surfaces are the priority, and a mix of concrete for utility areas and pavers for living areas often works well.

    Whatever you choose, build it once and build it right. Browse finished projects in our project gallery to see how pavers look after they have been through a few of our seasons.

    Weighing pavers against concrete for your yard?

    We will walk your lot, check the soil and slope, and explain which surface fits how you live outdoors, with no pressure either way. Estimates are free. Ring us at (928) 848-0706 or describe your patio plans online. Every hardscape job we take on is covered by our bond, our insurance and Arizona ROC license 336502.

    Pavers vs concrete patio: frequently asked questions

    Which costs less upfront, a paver patio or a poured concrete patio?

    A plain broom-finished concrete slab is usually the lower upfront cost. Pavers cost more to buy and install because each piece is placed by hand and the base is built in compacted layers. Decorative stamped concrete narrows that gap considerably. Over many years, the easier repairs and longer-lasting appearance of pavers can offset part of their higher starting price.

    Can pavers be installed over an existing concrete slab?

    Sometimes. If the slab is structurally sound, reasonably level and drains away from the house, thinner pavers can be set over it using an appropriate bedding method. If the slab is badly cracked, heaving or holding water, it is better removed so a proper base can be built. Added height at doors and steps must also be checked before deciding.

    How is a cracked concrete patio repaired compared with a damaged paver area?

    Small concrete cracks are cleaned and filled with a flexible sealant, while larger failures usually mean cutting out and repouring a section that will not match the original. With pavers, the affected pieces are lifted, the base beneath is corrected and the same pavers are reset, so the repaired area blends in with the rest of the patio.

    Will weeds grow between pavers?

    Weeds can sprout where windblown seeds land in joints that have lost sand or collected organic debris. Keeping joints full, sweeping regularly and using polymeric jointing sand, which hardens once activated with water, all reduce the problem. Weeds rarely grow up through a well-built base; most start from seeds on the surface.

    Should I seal my patio in the high desert?

    Sealing is optional for both surfaces. On concrete, a quality sealer helps limit water absorption and staining. On pavers, it can enrich color, make cleanup easier and help hold joint sand in place. Strong sun at our elevation breaks sealers down over time, so plan on periodic reapplication if you choose to seal.

    Which patio surface stays cooler on a sunny afternoon?

    Surface color matters more than whether you pick pavers or concrete. Light tan, buff and soft gray tones reflect more sunlight and stay more comfortable than charcoal, deep red or dark brown. Shade from a pergola, tree or covered patio makes the biggest difference of all for summer comfort.

    Is stamped concrete a good compromise between pavers and plain concrete?

    Stamped concrete gives a patterned, stone-like appearance at a cost that often falls between plain concrete and pavers. Because it is still one continuous slab, it can crack with soil movement, and those cracks cut across the pattern. Repairs are difficult to blend because the color and stamp texture rarely match exactly.

    Can a paver patio support a hot tub or a heavy outdoor kitchen?

    Pavers can carry heavy loads when the base is designed for them, which usually means deeper, well-compacted aggregate under the load area. Always follow the hot tub or appliance manufacturer’s foundation requirements, as some specify a concrete pad. We plan the base around the heaviest item you intend to place on the patio before construction starts.

    Is ice melt safe to use on pavers and concrete?

    Use any deicer sparingly and read the label first. Products marketed as safe for concrete and masonry are the better choice, and newly poured concrete is especially vulnerable during its first winter. Shoveling or sweeping snow promptly reduces how much ice melt you need, and rinsing residue off in spring protects both surfaces and nearby plants.

    Do tree roots damage pavers or concrete more?

    Roots can lift either surface if a patio is built too close to a large tree. Concrete tends to crack where a root pushes up, which usually means cutting out a section. Pavers will lift too, but the pieces can be removed, the root situation addressed and the same pavers relaid, making pavers the more forgiving choice near trees.

  • Monsoon Yard Drainage, Prescott AZ: A High-Desert Homeowner’s Guide

    Monsoon Yard Drainage, Prescott AZ: A High-Desert Homeowner’s Guide

    Solid monsoon yard drainage Prescott homes can depend on comes down to one goal: move storm water away from your home before it can pool, erode or seep. That means grading soil so it falls away from the foundation, sending roof water well clear of the house, and giving runoff a planned path such as a swale, dry creek bed or French drain.

    Key takeaways

    • Most of Prescott’s yearly rain arrives in a few intense July–September storms that fall on ground baked hard by a dry May and June.
    • Correct grading is the cheapest and most important fix: aim for at least 6 inches of fall in the first 10 feet away from the foundation where the lot allows.
    • Roof runoff is concentrated water. Downspouts need extensions, splash zones or a buried line that releases it far from walls and walkways.
    • Surface solutions (swales, dry creek beds, permeable ground) handle most yards; buried French drains are for stubborn wet spots and subsurface water.
    • Slopes and retaining walls need their own drainage plan, or water pressure and erosion will undo the work.
    • A short pre-monsoon checklist in June prevents most storm-day surprises.

    Why do monsoon storms overwhelm high-desert yards?

    Prescott sits at roughly 5,400 feet, and its rain does not arrive evenly. Long-term weather normals put the city’s average yearly precipitation near 16.5 inches, yet May and June together usually deliver well under an inch. Then the North American monsoon sets in, and July and August each average close to three inches on their own. Much of that comes in short, heavy cloudbursts rather than gentle all-day showers.

    That timing is the root of most drainage trouble we see. After weeks of sun, bare soil develops a crust that sheds water instead of absorbing it. When a thunderstorm drops a large amount of rain in twenty or thirty minutes, the water has nowhere to go but sideways. It follows whatever low line it can find: along a foundation, across a patio, down a side yard or straight through a planting bed, carrying gravel and topsoil with it.

    Lots in this area add their own complications. Many homes in Prescott and the surrounding communities are built on sloped ground, and soils vary from fast-draining granite-derived grit to compacted fill left by construction equipment. Two neighboring yards can behave completely differently in the same storm. The National Weather Service office in Flagstaff, which forecasts for Yavapai County, publishes useful monsoon safety and season information if you want to understand what drives these storms.

    The good news is that monsoon water behaves predictably once you watch it. Water always seeks the lowest available path. A drainage plan simply decides that path in advance so the storm does not choose it for you.

    What are the warning signs your yard is not draining?

    The best time to study drainage is during or right after a real storm. Put on a rain jacket, walk the property and look for these clues. If you miss the storm, the evidence usually stays visible for days.

    • Standing water near the house that lingers more than an hour or two after rain stops.
    • Soil or gravel washed onto walkways, patios or the driveway, leaving fan-shaped deposits.
    • Channels cut into beds or bare soil, especially below downspouts and at the bottom of slopes.
    • Stains or efflorescence (white, chalky residue) on stem walls, block walls or the lower edge of stucco.
    • Exposed footing or settling where soil has eroded away from the base of the house or a wall.
    • Musty smells or damp spots in a crawl space, garage or basement after storms.
    • Gravel migrating into one corner of the yard or piling against a fence line.
    • Plants that drown in one bed while others nearby stay healthy, a sign water is collecting in a pocket.

    Take photos with the date showing. A few storm-day pictures are far more useful to a designer than a description, because they show exactly where water enters the property, where it slows and where it leaves.

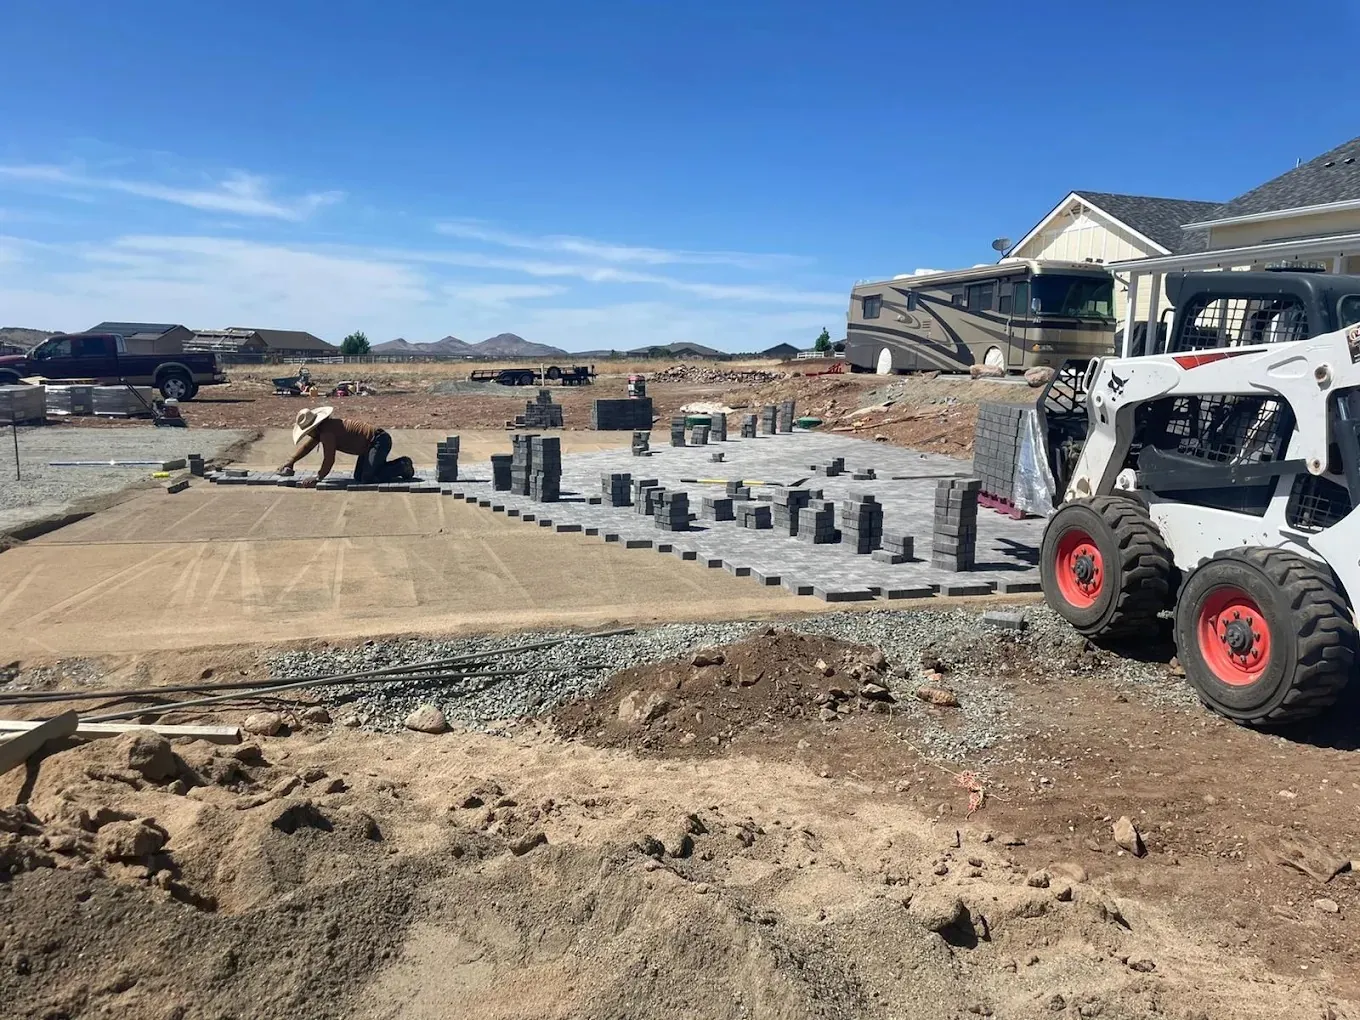
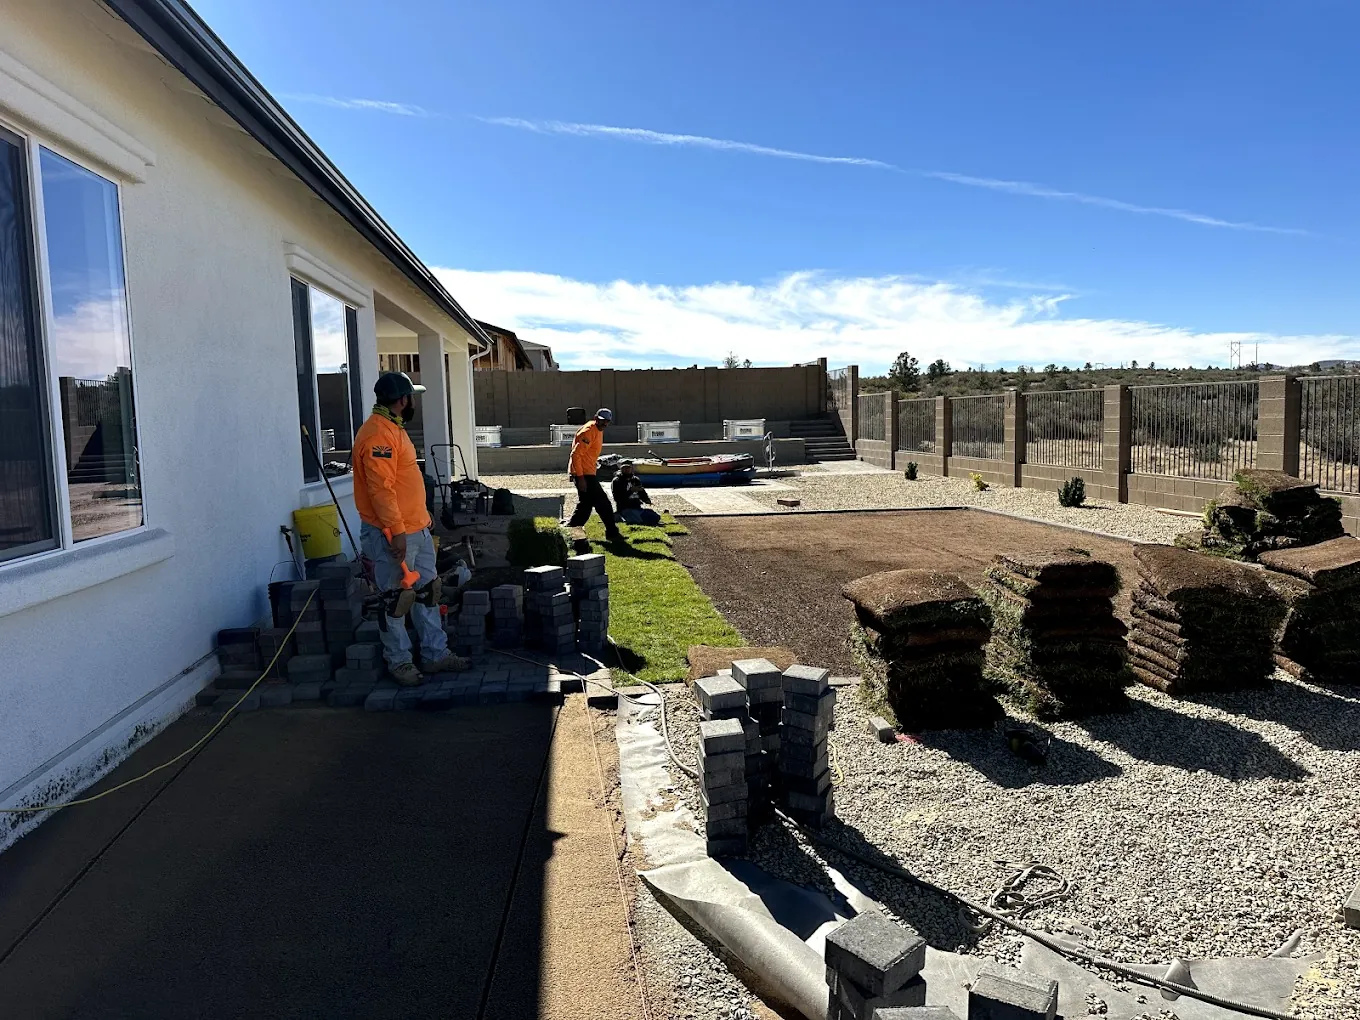
    Crew grading and preparing base for a paver patio to improve monsoon yard drainage in Prescott
    Grading and base preparation happen before anything decorative goes in. This is where drainage is won or lost.

    How does grading fit into monsoon yard drainage in Prescott?

    Grading is the shape of the ground, and it decides where every drop goes. Before investing in pipes or rock channels, confirm that the soil around your home falls away from it. A common building-code benchmark is at least 6 inches of fall within the first 10 feet from the foundation. On tight lots where that is not possible, a shallow swale can be shaped to carry water around the house instead.

    How to check your grade

    1. Drive a stake at the foundation and another about 10 feet out.
    2. Run a string between them and level it with a line level.
    3. Measure from the string down to the soil at each stake. The outer measurement should be at least 6 inches greater than the one at the house.
    4. Repeat on every side of the home, including narrow side yards that are easy to forget.

    Common grading problems we correct

    Settled backfill. Soil placed against a new foundation often settles over the first few years, creating a moat that holds water right where you least want it.

    Beds built up against the wall. Raised planting beds, extra gravel or mulch piled against stucco can reverse the slope and bury weep screeds that need to stay exposed.

    Hardscape that tilts the wrong way. A patio or walkway poured or laid flat, or pitched toward the house, delivers water to the foundation every time it rains. Patios should carry a gentle pitch away from the home, which is something we build into every paver installation from the base up.

    Block walls acting as dams. Perimeter walls common in Prescott Valley subdivisions can trap water in a backyard unless the wall has weep openings or the grade is shaped to a planned outlet.

    Regrading is often done with small equipment and careful hand work. Any time digging is involved, the first step is a locate request through Arizona 811 at least two full working days ahead so buried utilities are marked.

    How should roof runoff and downspouts be handled?

    A roof gathers rain from a large area and dumps it out of a handful of downspouts. During a monsoon cell, each downspout can act like an open hose aimed at your foundation. Getting that water away from the house is one of the highest-value improvements in any drainage plan.

    Options from simplest to most involved

    • Extensions and splash blocks. The minimum. Extend discharge several feet from the wall onto a splash block or rock pad so falling water does not dig a hole.
    • Rock splash zones. A shaped bed of cobble or angular rock that absorbs the energy of the water and spreads it out. It also looks intentional rather than improvised.
    • Connection to a dry creek bed or swale. The downspout feeds directly into a designed channel that carries water to a safe outlet.
    • Buried solid pipe. The downspout connects to a smooth-walled pipe below grade that releases water at a pop-up emitter or daylight outlet farther down the yard. This keeps walkways clear and is useful where space is tight.

    Two details make or break a buried downspout line. First, it needs steady fall along its entire length, or it will hold standing water and debris. Second, it needs a clean-out or accessible inlet so pine needles, leaves and grit can be flushed out. Gutters themselves should be cleared before each monsoon season, because an overflowing gutter defeats every downspout improvement below it.

    What are the best surface drainage solutions for monsoon storms?

    Most yards in the Prescott area can be managed with surface drainage, meaning water stays on top of the ground but follows a designed route. Surface systems are easy to inspect, simple to maintain and fit naturally into desert-style landscapes.

    Swales

    A swale is a broad, shallow channel shaped into the ground. It may be lined with gravel, planted, or simply left as compacted soil. Swales slow water down and guide it gently, which also gives some of it time to soak in. They work well along side yards and at the base of slopes.

    Dry creek beds

    A dry creek bed is a rock-lined channel that looks like a natural wash for most of the year and carries water during storms. Done properly, it uses a mix of rock sizes, larger stones on the edges and outside bends, and a fabric or compacted base where needed to keep the channel from scouring. A creek bed is one of the most popular ways to turn a drainage problem into a landscape feature, and it pairs naturally with low-water planting along its banks. You can see how we blend rock, gravel and planting in our xeriscaping and irrigation work.

    Permeable ground covers

    Where possible, let water soak in rather than run off. Open gravel areas, planting beds with good soil structure and thoughtfully designed hardscape layouts all reduce the volume that has to be moved. Every square foot of hard surface you add increases runoff, so drainage should be considered in the same conversation as any new patio, walkway or turf area.

    Comparing common monsoon drainage options
    Option Best for Visibility Upkeep
    Regrading Water flowing toward the house Invisible once planted Check yearly for settling
    Downspout extension or splash zone Concentrated roof water Low Keep outlets clear
    Swale Guiding sheet flow around buildings Subtle dip in the ground Remove sediment after storms
    Dry creek bed Larger flows and visible channels A landscape feature Reset displaced rock occasionally
    French drain Persistent wet spots, subsurface water Hidden below grade Flush outlet, watch for clogging
    Buried solid pipe Moving downspout water past walkways Hidden except outlet Clean inlet screens
    Stepped paver patio and stone retaining wall built to manage runoff on a sloped Prescott lot
    Terracing a slope with walls and level patio areas slows water and gives it a controlled route down the yard.

    When is a French drain the right call?

    A French drain is a gravel-filled trench, usually with a perforated pipe in the bottom, that collects water below the surface and carries it away. It is a strong tool, but it is not the first one to reach for. If surface water is simply running toward the house, regrading or a swale usually solves it with less digging and less maintenance.

    French drains earn their place in situations like these:

    • A low spot stays soggy long after storms even though the grade around it looks correct.
    • Water moves through the soil from an uphill neighbor or slope and surfaces in your yard.
    • There is no room for a visible channel, such as a narrow side yard between a house and a block wall.
    • Water needs to be collected behind a structure, such as the back of a retaining wall.

    The details matter. The trench needs consistent fall to an outlet that can actually accept the water. Clean, washed gravel and a filter fabric wrap help keep fine soil from clogging the system over time. And the outlet must discharge somewhere safe on your own property or to an approved location, never onto a neighbor. A French drain with no good outlet simply becomes an underground bathtub.

    Because French drains are buried, they are hard to inspect. We recommend leaving a clean-out at the upper end so the line can be flushed with a hose, and checking the outlet after the first few storms to confirm water is flowing out the way it should.

    How do slopes, erosion and retaining walls affect drainage?

    Sloped lots are common across Yavapai County, and they magnify every drainage issue. Water speeds up as it travels downhill, and fast water carries soil. Over several monsoon seasons, an unprotected slope can lose a surprising amount of ground, undermining fences, walkways and the edges of patios.

    Ways to slow water on a slope

    • Terracing breaks a long slope into shorter, flatter steps so water never builds up much speed.
    • Rock armoring with larger angular stone on steep sections and in channels resists scouring.
    • Check structures, such as low rock lines across a swale, slow water and drop sediment before it reaches the bottom.
    • Ground cover, whether planting or a properly placed rock blanket, protects bare soil from the impact of heavy drops. General erosion control principles apply here: cover the soil and slow the water.

    Drainage behind retaining walls

    A retaining wall holds back soil, and when that soil is saturated it becomes much heavier and pushes harder on the wall. That is why a well-built wall includes drainage behind it: free-draining gravel backfill, a perforated collection pipe at the base where the design calls for one, and a way for the collected water to exit. Walls built without this often lean, bulge or crack after a few wet seasons. If you are planning a wall to tame a slope, our retaining wall builds treat drainage as part of the structure, not an add-on.

    The top of the wall needs attention too. Grade the area above so water does not pour over the cap in a sheet, and consider a shallow swale behind the wall to intercept runoff before it soaks into the backfill.

    Narrow side yard with artificial turf and gravel edge along a block wall, laid to shed monsoon runoff
    Side yards between a house and a block wall are a classic trouble spot. A gravel edge and correct pitch keep water moving to an outlet.

    Can you put monsoon water to work instead of just moving it?

    Getting water away from the house does not mean wasting it. In a region where spring is so dry, many homeowners like the idea of capturing some summer rain for later. There are two broad approaches.

    Passive harvesting shapes the landscape so runoff is directed into planted basins away from structures. A swale or creek bed can end in a shallow, rock-lined basin around trees or shrubs, letting water soak in where roots can use it. This needs no tanks or pumps, only good grading and a safe overflow route for big storms.

    Active harvesting collects roof water in barrels or tanks for later use on plants. It works best when the tank is sized realistically, screened against mosquitoes and debris, and fitted with an overflow that connects to the rest of the drainage system. Check any homeowners association rules about visible tanks before installing one.

    Either way, the harvesting feature must sit well away from foundations and must always have a planned overflow. A monsoon storm can fill a basin or barrel quickly, and the extra water still needs somewhere safe to go. Harvested water also pairs well with efficient drip zones, which our yard maintenance visits can help keep tuned through the season.

    What should be on a pre-monsoon drainage checklist?

    Early to mid-June, before the first storms, is the ideal time to walk through this list. Most items take an afternoon and cost little.

    1. Clean gutters and confirm every downspout is attached and discharging away from the house.
    2. Check that downspout extensions, splash blocks and pop-up emitters are in place and not buried.
    3. Rake sediment and debris out of swales, creek beds and drain inlets.
    4. Flush buried drain lines with a hose and make sure water appears at the outlet.
    5. Look for soil or mulch piled against stucco or siding and pull it back to restore slope and expose weep screeds.
    6. Clear weep holes or openings at the base of block walls so trapped water can exit.
    7. Re-seat any rock that shifted out of channels or splash zones during last season.
    8. Inspect the base of slopes and retaining walls for new cracks, bulges or erosion.
    9. Make sure patio and walkway edges have not settled into a lip that holds water.
    10. Take a few reference photos so you can compare after the first big storm.

    After each significant storm, do a quick follow-up walk. Note anything that moved, overflowed or pooled. Small corrections made in July prevent large repairs in September.

    How drainage differs in Chino Valley, Dewey-Humboldt, Prescott and Prescott Valley

    Each community we serve brings its own drainage pattern. In Prescott, hillside homes and boulder-strewn lots near granite outcrops often need terracing and armored channels to handle fast-moving water. In Prescott Valley, sitting around 5,060 feet, many backyards are enclosed by block walls, so the key question is how water exits the yard without pooling against the wall or the patio.

    Out in Chino Valley, larger and more open parcels can receive runoff from neighboring land, and long driveways or arena areas may need broad swales and culvert-style crossings. Homes in Dewey-Humboldt often sit near natural washes, where the priority is protecting structures and access while letting the wash keep doing its job.

    Whatever the setting, a good drainage plan starts with a site visit during or shortly after rain when possible, a look at where water enters and leaves the property, and a design that fits the rest of the landscape. We would rather build one well-placed creek bed than three patches that fight each other. Browse our project gallery to see grading, walls and rock work on finished yards.

    Worried about this year’s storms? Our crew can walk your property, trace where the water goes and design a drainage fix that also looks good. Call (928) 848-0706 or request your free estimate online. Our license number is ROC 336502, we carry bond and insurance, and anyone can verify the license through the Registrar of Contractors site.

    Monsoon yard drainage: frequently asked questions

    When does monsoon season usually reach the Prescott area?

    The heaviest monsoon rain around Prescott typically falls from July through September, with July and August each averaging close to three inches. Storms can start in late June in some years. Because May and June are usually the driest months, it makes sense to finish drainage checks and repairs in early June, before the ground starts taking hard afternoon downpours.

    How much should the ground slope away from my foundation?

    A widely used benchmark is at least 6 inches of fall within the first 10 feet from the foundation. Where a property line, wall or neighboring house makes that impossible, a shallow swale can be shaped closer to the house to carry water around it instead. The aim is simply that no water ever sits against the stem wall.

    Is a dry creek bed or a French drain better for my yard?

    It depends on where the water is. If runoff travels across the surface during storms, a dry creek bed or swale is usually the better choice because it is visible, easy to maintain and doubles as a landscape feature. A French drain suits wet spots that stay soggy below the surface or narrow areas with no room for a channel.

    Where should downspout water be sent?

    Send it several feet away from the house at minimum, onto a rock splash zone, into a designed channel, or through a buried solid pipe to an outlet farther down the yard. The discharge point should drain away from walkways and the foundation, stay on your own property, and have enough rock to stop the falling water from digging a hole.

    Can decomposed granite or gravel wash away during monsoon storms?

    Yes. Loose gravel and decomposed granite on a slope or in a flow path can migrate during heavy rain. Using larger angular rock in channels, adding edging, compacting stabilized surfaces properly and directing concentrated water around rather than across gravel areas all reduce washouts. Re-raking after big storms is normal upkeep for loose materials.

    Do I need to call Arizona 811 before installing a drainage system?

    Yes. Before anyone trenches, regrades, lays pipe or shapes a creek bed, an Arizona 811 locate request needs to go in, giving the utilities two or more full working days to mark their lines. Utilities such as gas, electric, water and communication lines can be shallower than people expect, and marking them first protects both the crew and the household.

    Can I send my yard’s runoff toward the street or my neighbor’s lot?

    You should never redirect concentrated runoff onto a neighbor’s property; it can damage their yard and lead to disputes. Releasing water toward the street may or may not be acceptable depending on local rules and how your lot is laid out. A good plan keeps water on your property where possible, slows it down and spreads it out before it leaves.

    What signs show water is collecting against my foundation?

    Look for puddles that stay next to the house after rain, white chalky residue or dark staining at the base of stucco, soil that has washed away to expose footing, and damp or musty areas in a crawl space or garage. Any of these after a storm suggests the grade or roof drainage needs correcting before the next one.

    Is rainwater harvesting worth it with only about 16 inches of rain a year?

    It can be, because so much of that rain arrives in a short window. Passive harvesting, which steers runoff into planted basins away from the house, adds water to the soil with no ongoing cost. Barrels and tanks capture roof water for later use. Both need a safe overflow, since a single strong storm can exceed their capacity.

    What drainage maintenance should I do after a big monsoon storm?

    Walk the yard within a day or two. Clear sediment from swales, creek beds and drain inlets, reset any rock that moved, check that downspout outlets are open, and note new channels or puddles. Look at slopes and the base of retaining walls for fresh erosion. Small fixes made right away stop the next storm from widening the damage.

  • Firewise Landscaping, Prescott AZ: A Zone-by-Zone Guide to Defensible Space

    Firewise Landscaping, Prescott AZ: A Zone-by-Zone Guide to Defensible Space

    Good firewise landscaping Prescott homeowners can count on means arranging your yard so a wildfire, and especially wind-blown embers, finds little to burn near your house. You keep the first five feet around the home noncombustible, thin and space vegetation out to about 100 feet, remove ladder fuels, and maintain it all before the dry, windy weeks of late spring.

    Key takeaways

    • Most homes lost to wildfire are ignited by embers landing on or next to the house, not by a wall of flame, so the area closest to your walls matters most.
    • NFPA’s Firewise approach splits your property into three home ignition zones: 0 to 5 feet, 5 to 30 feet and 30 to 100 feet.
    • Inside five feet, swap bark and wood chips for rock, pavers or bare mineral surfaces, and keep plants out of that strip.
    • Spacing and pruning break the “fuel ladder” that lets ground fire climb into shrubs, trees and eaves.
    • Firewise work is never one-and-done; a yearly cleanup before the late-spring dry spell keeps the protection real.

    Why does Prescott need firewise landscaping?

    Prescott sits at roughly 5,400 feet among the Bradshaw Mountains, where chaparral, juniper, oak and ponderosa pine run right up to neighborhoods. Planners call this blend of homes and wildland the wildland-urban interface, and a large share of Yavapai County lives inside it. The local weather pattern stacks the odds further. Spring and early summer are the driest stretch of the year here, with May and June averaging well under an inch of rain combined, and that dry spell usually arrives with gusty afternoon winds. Grasses cure, shrubs lose moisture, and a single spark can travel fast before the July monsoon finally brings relief.

    People in this area understand the stakes. The Yarnell Hill Fire in 2013 took the lives of 19 Granite Mountain Hotshots from the Prescott Fire Department, and that loss still shapes how many families here think about the land around their homes. Firewise landscaping will not stop a wildfire. What it does is give your house a far better chance of surviving one, and give firefighters a safer place to work if they arrive.

    The good news is that a fire-resistant yard does not have to look bare or barren. Many of the features homeowners already want, such as paver patios, gravel paths, stone walls and tidy, well-watered planting beds, double as fire-smart design when they are placed with intent.

    How do embers actually ignite homes?

    When people picture wildfire damage, they imagine a towering flame front rolling over a house. In reality, many homes ignite from embers: burning bits of bark, needles and debris lofted by wind, sometimes well ahead of the main fire. Those glowing fragments land in gutters, on doormats, in a pile of firewood, against a wooden fence, or in a bed of shredded bark beside the foundation. If something there catches, a small spot fire can spread into vents, siding or the deck, and the house burns even though the main fire never touched it.

    That is why firewise design focuses so hard on the ground right next to your walls. Ember showers can last for a long time during a wind-driven event, and they land in the same places over and over: corners, inside angles where walls meet, under decks and along fence lines where debris collects. The goal is simple to state: when an ember lands within arm’s reach of your house, it should find rock, concrete, metal or bare soil, not fuel.

    Radiant heat and direct flame

    Embers are not the only threat. Large shrubs or trees burning close to a wall throw intense radiant heat that can crack windows or ignite siding, and tall vegetation touching eaves can carry flame directly to the roof. Spacing plants farther apart and keeping big fuel loads away from the house reduces both of these pathways at the same time.

    What are the three home ignition zones?

    The NFPA Firewise USA program organizes the land around a house into three rings, measured outward from the walls and any attached deck. Each ring has a different job, and the effort you put in should be heaviest near the house and lighter as you move away.

    Zone Distance from home Main goal Typical actions
    Immediate 0 to 5 feet Nothing that can catch an ember Rock or pavers instead of bark, no plants against walls, clean gutters and roof, move firewood away
    Intermediate 5 to 30 feet Slow and lower any fire that approaches Space shrubs into islands, prune trees up, mow grass short, use hardscape breaks
    Extended 30 to 100 feet Keep fire on the ground and away from crowns Thin dense brush, clear dead material, separate tree canopies, remove ladder fuels

    If your lot is small, the outer zones may land on a neighbor’s property or common area, which is one reason firewise efforts work best when a whole street participates. More on that near the end of this guide.

    Zone 1: the noncombustible strip (0 to 5 feet)

    This is the single most valuable place to invest. Walk the perimeter of your house and look down. Anything that would burn if a glowing coal sat on it for a minute should go or be replaced.

    Swap organic mulch for mineral cover

    Shredded bark, pine straw and wood chips are popular because they look natural and hold moisture, but next to a wall they act like kindling. Replace them within that five-foot band with crushed rock, river cobble, decomposed granite or pavers. A clean border of stone also makes it easy to spot debris and sweep it away. Our paver and hardscaping work often starts right here, turning a mulched strip into a walkway or patio edge that looks finished and gives embers nothing to work on.

    Keep plants out of the strip

    Even healthy plants collect dry leaves at their base and can carry fire to siding. Within five feet, the safest choice is no plants at all. If you want some softening, use well-watered, low-growing plants in containers that you can move, and keep them clear of windows and vents.

    Clean the “hidden” fuel

    • Clear needles and leaves from gutters, roof valleys and the space under decks.
    • Move firewood, lumber, spare propane cylinders and trash cans at least 30 feet from the house during fire season.
    • Replace coir doormats and wicker furniture near doors with materials that will not smolder.
    • Check that foundation and attic vents have fine metal mesh so embers cannot slip inside.
    Firewise landscaping Prescott example: paver walkway, gravel beds and spaced boulders in a desert backyard
    Pavers, gravel and boulders give embers very little to ignite, while still reading as a finished, inviting backyard.

    Zone 2: the managed yard (5 to 30 feet)

    Beyond the noncombustible strip, plants are welcome, but arrangement becomes everything. The idea is to break up continuous fuel so that any fire reaching this zone stays low, slow and patchy instead of racing from one shrub to the next.

    Create islands, not hedges

    Group shrubs into separate islands with gravel, pavers or low irrigated groundcover between them. A solid hedge line or a band of dense brush connects fuel the way a fuse connects to a firework. Gaps between groups interrupt that path. Thoughtful landscape design can make these islands look intentional, with paths and seating areas doing double duty as firebreaks.

    Prune up and thin out

    Firewise guidance recommends removing lower tree branches so there is a clear gap between the ground and the canopy. NFPA suggests pruning mature trees six to ten feet up from the ground, and for smaller trees, limiting pruning to about a third of the tree’s height so it stays healthy. In the intermediate zone, the same guidance calls for generous spacing between tree crowns, roughly 18 feet, so fire cannot hop from one canopy to the next.

    Water and mow what stays green

    Plants with good moisture content resist ignition far better than drought-stressed ones. A tuned drip irrigation system keeps beds hydrated without wasting water, and any native grass areas should be cut short, around four inches or lower, once they cure in late spring.

    Use hardscape as firebreaks

    Patios, walkways, gravel courts and low stone walls all interrupt fuel. Where a slope runs toward the house, a stone retaining wall can create a level, noncombustible terrace that slows fire moving uphill, which it tends to do quickly.

    Paver patio, block planter wall and gravel beds creating fuel breaks around a Prescott Valley home
    Block walls, gravel beds and a paver patio separate planted areas so fire has no continuous path toward the house.

    Zone 3: the outer property (30 to 100 feet)

    Larger lots in Chino Valley, Dewey-Humboldt and the hills around Prescott often extend into native brush. Out here the objective is not a manicured yard but a forest or shrubland that burns on the ground instead of in the treetops.

    • Remove dead material. Fallen branches, dead shrubs and accumulated needles are the easiest fuel to eliminate and the most dangerous to leave.
    • Break up thickets. Thin dense stands of brush so individual plants stand apart rather than forming a continuous mat.
    • Separate canopies. NFPA guidance suggests about 12 feet between tree crowns from 30 to 60 feet out, tapering to roughly 6 feet between 60 and 100 feet.
    • Clear ladder fuels. Shrubs and small trees growing under larger trees act as rungs that lift flame into the canopy. Remove them or limb the larger tree higher.
    • Dispose of debris properly. Chip it and spread it thinly far from the house, haul it to a green waste facility, or follow local burn rules if burning is allowed.

    Steep, rocky ground can make this work slow. If the slope is too much to handle safely, our yard maintenance crew can take on clearing and hauling so the job gets done before the dry season.

    Which landscape materials hold up best?

    Every surface in your yard either adds fuel or removes it. The table below compares common choices from a fire point of view only, so you can decide where each belongs.

    Material Ember resistance Best placement Notes
    Crushed rock, cobble High Immediate zone and paths Does not burn; easy to rake debris off
    Decomposed granite High Walkways, seating areas Compacts into a firm, mineral surface
    Concrete pavers, flagstone High Patios, entries, wall bases Creates wide, durable firebreaks
    Composted fine mulch Low to moderate Outer beds beyond 5 feet Smolders less than coarse bark but still burns
    Shredded bark, pine straw Low Avoid near structures Catches embers easily and carries fire
    Rubber mulch Low Avoid near structures Ignites and burns hot once lit
    Artificial turf Moderate Open areas away from walls Does not carry flame like dry grass, but embers and hot coals can melt or scorch it

    A mix usually works best: mineral surfaces near the house, spaced and irrigated planting in the middle ring, and thinned native vegetation farther out. Defensible space is about layering these choices, not paving the whole lot.

    Fences, decks and fire features

    Where fences meet the house

    A wooden fence that connects to your wall works like a wick, leading flame straight to the siding. Firewise guidance recommends replacing at least the last five feet of fence nearest the house with a noncombustible section such as metal, masonry or block. Many homes in Prescott Valley already have block perimeter walls, which is a real advantage; keep the base of those walls clear of tumbleweeds and leaf drifts that pile up after windy days.

    Decks and the space beneath them

    The area under a deck is one of the most common ember traps. Enclose it with fine metal mesh or keep it completely clear, and lay gravel or pavers underneath instead of letting weeds and debris build up. Store nothing combustible below the deck boards.

    Fire pits and outdoor fireplaces

    An outdoor fire feature can be part of a fire-smart yard if it is designed responsibly. Set it on a wide paver or stone pad, keep the surrounding area clear of overhanging branches, and leave plenty of open, noncombustible space around the seating. Always follow local burn restrictions, which tighten during dry, windy periods, and keep a hose or extinguisher within reach. Our fire pit and outdoor living builds start with that kind of clearance planning.

    Landscaping crew building block walls and hardscape to create defensible space beside a home
    Block walls and hardscape installed close to the home replace combustible material with surfaces that resist embers.

    A fire-season maintenance calendar

    Defensible space fades if nobody tends it. Plants grow back, needles fall, and wind stacks debris against walls. Tie your upkeep to the local seasons and it becomes routine.

    1. Late winter (February to March): Prune trees while they are dormant, remove dead shrubs, and plan any hardscape changes so installation finishes before the dry season.
    2. Early spring (April): Clear gutters and roofs, rake the five-foot strip, cut back cured grasses, and move firewood away from the house.
    3. Peak dry season (May to June): Walk the property weekly after windy days, clear new debris, check irrigation for leaks or dead zones, and keep grass mowed short.
    4. Monsoon (July to September): Watch for fast regrowth after rain and trim it back before it dries out again in fall.
    5. Fall (October to November): Collect leaf drop and pine needles, especially from gutters and deck corners, before winter winds scatter them.

    Keep an eye on National Weather Service Flagstaff red flag warnings for the Prescott area. Those days call for an extra check of the immediate zone and for skipping anything that throws sparks, from mowing over rocks to grinding metal.

    Firewise yards across Prescott and the quad-city area

    Conditions shift noticeably across the region. In the higher, more wooded neighborhoods of Prescott, pine needles and oak leaves accumulate quickly, and steep lots make spacing and pruning the top priorities. In Prescott Valley, many homes sit on smaller lots surrounded by block walls, so the immediate zone and wind-blown debris along those walls deserve most of the attention. Out in Chino Valley and Dewey-Humboldt, larger parcels of grassland and brush make the extended zone and grass height the bigger concern.

    Working with neighbors

    Embers ignore property lines. If your neighbor’s yard is a tangle of dry brush ten feet from your wall, your own work only goes so far. The Firewise USA program gives neighborhoods a framework: residents form a small committee, complete a risk assessment, build an action plan and log their annual work. Arizona’s Department of Forestry and Fire Management and the federal Ready.gov wildfire page both offer planning resources that pair well with yard work.

    Want a second set of eyes on your defensible space?

    We can walk your property, point out where embers would find fuel, and lay out hardscape, gravel and planting changes that protect the house without making the yard feel stark. Phone the office at (928) 848-0706 or use our contact form to book a free walkthrough. We are a licensed Arizona contractor (ROC 336502), fully bonded and insured.

    Firewise landscaping in Prescott: frequently asked questions

    What does “firewise landscaping” actually mean?

    It is a way of designing and maintaining a yard so it resists wildfire. The approach comes from the NFPA Firewise USA program and focuses on three distance zones around the home, keeping the closest five feet free of anything that can burn, separating plants so fire cannot travel continuously, and maintaining that layout every year before the dry season.

    Why is the first five feet around a house so important?

    Embers often travel ahead of a wildfire and land right against the home, collecting in corners, along walls and under decks. If that strip contains bark mulch, dry plants or stored firewood, a small spot fire can start and spread into vents or siding. Keeping it noncombustible removes the most common way homes ignite.

    Is it safe to use bark mulch anywhere in a firewise yard?

    Yes, with limits. Keep coarse bark, pine straw and rubber mulch out of the zone within five feet of the house, deck and fences. Farther out, a thin layer of fine composted mulch around irrigated plants is a reasonable compromise. Rock, cobble and decomposed granite remain the safer choice wherever embers are likely to land.

    What are ladder fuels?

    Ladder fuels are low branches, shrubs and small trees that bridge the gap between the ground and a tree’s canopy. A grass fire that reaches them can climb into the crown, where it spreads faster and throws more embers. Pruning lower limbs and removing understory brush beneath larger trees cuts those rungs out of the ladder.

    How far apart should trees be for defensible space?

    NFPA Firewise guidance suggests roughly 18 feet between tree crowns in the 5 to 30 foot zone, about 12 feet between crowns from 30 to 60 feet, and around 6 feet from 60 to 100 feet. Steeper slopes call for wider spacing because fire runs uphill faster. Existing mature trees can often stay if you prune and clear beneath them.

    Can I keep a wood fence if I live in a wildfire area?

    Often yes, but change the section that touches the house. Firewise recommendations call for at least the last five feet of fence attached to the home to be noncombustible, such as metal, block or masonry. That gap stops the fence from leading flame directly to your walls. Also keep weeds and windblown debris cleared from the fence base.

    Does synthetic grass belong in a yard exposed to wildfire risk?

    It can be, in the right spot. Synthetic turf does not carry fire the way cured native grass does, but hot embers or coals can melt or scorch it. Use it in open areas set back from walls, keep a mineral border between turf and the house, and avoid placing it right beside an open fire feature.

    When is the best time to do firewise cleanup around Prescott?

    Aim to finish major pruning and clearing in late winter and early spring, before the dry, windy weeks of May and June. Then keep up lighter checks through early summer, after monsoon regrowth, and again in fall when leaves and needles drop. A short walk around the house after each windy day catches new debris.

    How does a neighborhood become a Firewise USA site?

    Residents organize a small board or committee, work with fire officials or a state forester on a community wildfire risk assessment, write a multi-year action plan, and hold at least one educational event. Each year the group invests in risk-reduction work and reports it to NFPA to keep the recognition active. The program’s website explains each step.

    Will firewise landscaping make my home fireproof?

    No yard can guarantee a house will survive a wildfire. Firewise landscaping improves the odds by removing the fuel embers need and by slowing any fire that approaches, which also gives firefighters a safer place to defend. Pair it with structure upgrades such as ember-resistant vents, clean gutters and a well-maintained roof for the strongest protection.

  • Drought-Tolerant Plants, Prescott AZ: A High-Desert Planting Guide

    Drought-Tolerant Plants, Prescott AZ: A High-Desert Planting Guide

    The drought tolerant plants Prescott AZ yards need are ones that can take a hard winter freeze, a bone-dry spring and a soaking summer monsoon in the same year. Blue grama grass, Apache plume, cliffrose, pointleaf manzanita, penstemons, Parry’s agave, red yucca and desert willow all fit that pattern, as long as they are planted in fast-draining soil and watered deeply while they establish.

    Key takeaways

    • Prescott sits around 5,400 feet, so “desert plants” chosen for Phoenix often die here in the first January. Cold hardiness matters as much as drought tolerance.
    • About 16.5 inches of precipitation falls in a typical year, and most of it arrives in winter storms and the July to September monsoon. May and June are the driest months, which is when new plants struggle most.
    • Early fall is the most forgiving planting window for hardy natives. Frost-tender plants should wait until after the average last freeze, around the start of May.
    • Even the toughest plant needs regular deep watering for its first one to two summers. After that, water less often but more deeply.
    • Grouping plants by water need, on separate drip zones, is the single biggest step toward a yard that stays green on very little water.

    What makes Prescott’s high desert hard on plants?

    When people hear “Arizona,” they picture saguaros and palm trees. Prescott is a different world. The city sits in the Bradshaw Mountains at roughly 5,400 feet, and Prescott Valley is only a few hundred feet lower. That elevation gives us four real seasons, and every one of them tests a plant in a different way.

    Winter brings regular hard freezes. On average, freezing temperatures can show up any time from about late October until the first days of May. Snow falls most winters, usually a light total of around ten inches across the season, and it tends to melt within a day or two. The bigger danger is the swing between day and night. Our daily temperature range averages close to 30 degrees, so a plant can sit in sunshine at 55°F in the afternoon and then drop into the low 20s before sunrise. Plants that are not built for that kind of whiplash crack, brown out or simply never wake up in spring.

    Spring is the hidden killer. April, May and June are the driest stretch of the year, and June often brings less than a quarter inch of rain. Wind adds to the stress. A plant that came through winter fine can dry out completely in May if nobody is watching the irrigation.

    Then the North American monsoon arrives. July and August are the wettest months of the year here, each averaging close to three inches of rain, much of it in short, heavy bursts. Plants that hate wet feet can rot if the soil around them holds water. So a good Prescott plant has to handle cold, drought and sudden downpours, often within a few months of each other.

    Summer heat itself is less of a problem than many newcomers expect. A typical year has around 44 days at 90°F or warmer, but 100°F days are rare, only one or two a year on average. That is why many low-desert favorites that thrive on heat but cannot handle cold are poor choices for us, while plants from the Colorado Plateau, the Great Basin and the mountains of New Mexico often do beautifully.

    How do you read your yard before you buy plants?

    Before choosing a single plant, spend some time looking at the yard you actually have. Two homes on the same street can have very different growing conditions, and matching the plant to the spot is far cheaper than replacing it next year.

    Sun and exposure

    South- and west-facing walls bounce heat back onto plants and stay warmer in winter. They suit agaves, yuccas and sun-loving perennials. North-facing beds stay shaded and cold for weeks after a snow, so they are a better home for shrubs like manzanita and cliffrose that tolerate cooler roots. East-facing spots, with gentle morning sun and afternoon shade, are the most forgiving place for plants that are new to you.

    Wind and cold pockets

    Cold air flows downhill and settles in low spots, just like water. If your yard has a dip, a drainage path or the bottom of a slope, expect it to be several degrees colder on still winter nights. Save your toughest, most cold-hardy plants for those areas. Windy, open lots in Prescott Valley and Chino Valley dry plants out faster, so give new plantings some shelter from a wall, a boulder or larger shrubs where you can.

    Soil and drainage

    Much of the Prescott area has soil weathered from granite, the same rock you see in the Granite Dells. It is coarse, gritty and low in organic matter, and it usually drains well, which most drought tolerant plants love. Some lots have pockets of clay or a compacted layer left behind by construction equipment, and those spots can hold water for days after a monsoon storm.

    A simple drainage test tells you a lot. Dig a hole about a foot deep, fill it with water, let it drain, then fill it again and watch how long the second fill takes to disappear. If the water is gone within a few hours, almost any plant on our list will be happy. If it is still sitting there the next morning, either choose plants that tolerate heavier soil or plant on a slight mound so the crown sits above the wettest zone.

    Your hardiness zone

    The Prescott area falls roughly in USDA zones 7b to 8a, depending on elevation and exactly where you live. You can confirm your own zone by entering your ZIP code on the USDA Plant Hardiness Zone Map. When a plant tag says “hardy to zone 8,” treat that as borderline here, and put it in a warm, protected spot. Plants rated to zone 7 or colder are a safer bet across most of the area.

    Drought tolerant plants Prescott AZ homeowners can use, planted in gravel beds beside a paver patio with landscape lights
    Low-water shrubs and perennials set in gravel beds along a patio we built. Warm, sunny edges like this suit heat-loving desert plants.

    Drought tolerant plants Prescott AZ gardeners can count on

    The plants below are ones that handle our cold winters, our dry springs and our monsoon rain when they are sited well. This is not a complete list. Your local nursery and the University of Arizona Cooperative Extension office in Yavapai County are both good sources for more options suited to your exact elevation.

    Plant Type Size (typical) Why it works here Best spot
    Blue grama grass Native bunchgrass 1–2 ft Very cold hardy, greens up with summer rain, eyelash-shaped seed heads Full sun, open areas, slopes
    Apache plume Native shrub 3–6 ft White spring flowers followed by feathery pink seed plumes; shrugs off cold and drought Full sun, informal borders
    Cliffrose Native evergreen shrub 4–8 ft Fragrant cream flowers in spring, evergreen all winter Full sun to light shade, screens
    Pointleaf manzanita Native evergreen shrub 3–6 ft Smooth red bark and small pink-white flowers; part of local chaparral Well-drained, slopes, little summer water once established
    Penstemons Perennial 1–3 ft Tall flower spikes that draw hummingbirds in spring Full sun, lean gritty soil
    Rubber rabbitbrush Native shrub 3–5 ft Bright yellow flowers in fall when little else blooms Full sun, tough open ground
    Parry’s agave Succulent 2 ft tall, 2–3 ft wide One of the most cold-tolerant agaves; native to Arizona’s mountains Sunny, fast-draining bed or mound
    Red yucca Succulent-like perennial 3 ft clumps, taller flower stalks Coral flower spikes all summer, handles cold and reflected heat Hot walls, driveways, sunny beds
    Desert willow Small deciduous tree 15–25 ft Orchid-like flowers through summer, light shade, low water once established Full sun, specimen or patio tree

    Grasses

    Blue grama is one of the most useful plants for a Prescott yard. It is a warm-season bunchgrass, which means it stays tan through winter and turns green once warm weather and monsoon rains arrive. Its seed heads stick out sideways like little eyebrows and catch the late-afternoon light. Plant it in drifts on slopes, along paths or as a soft, unmowed meadow. Deer grass is another good option where you want a larger, fountain-shaped clump with more presence.

    Shrubs

    Apache plume is a native shrub with small white rose-like flowers in spring. They are followed by fuzzy pinkish seed heads that glow when backlit. It is open and airy rather than dense, so it works well in informal, natural-looking beds. Cliffrose is evergreen, with small dark leaves and a strong, sweet scent when it flowers. Be aware that deer like to browse it, so young plants may need a wire cage for the first couple of years.

    Pointleaf manzanita grows wild in the chaparral around Prescott. Its smooth mahogany bark is beautiful in winter light, and it flowers in late winter or early spring. The trick with manzanita is drainage and restraint. It wants gritty soil and very little summer water once established, and it is one of the plants most often killed by kindness. Rubber rabbitbrush fills the late-season gap with masses of yellow flowers in fall, and it is about as tough as a shrub can be, although it can seed itself around if you let it.

    Perennials and groundcovers

    Penstemons are a large group of flowering perennials, and several species do well in Prescott, including firecracker penstemon with its red tubular flowers and Palmer’s penstemon with taller pink spikes. They prefer lean soil and dislike rich compost or constant overhead watering. Many are short-lived, but they reseed in gravel, so a small planting often turns into a lasting colony. Blackfoot daisy and Angelita daisy are small native groundcover perennials that flower for months and stay neat along path edges.

    Succulents and accent plants

    Parry’s agave is native to the mountains of central Arizona and handles cold far better than most agaves sold in big-box stores. It forms a tight, symmetrical blue-gray rosette and slowly produces offsets around its base. Like most agaves, it flowers once after many years, sending up a tall stalk, and the mother plant then dies while the pups carry on. Red yucca is not a true yucca, but it looks like one, with long, narrow leaves and arching coral flower stalks that hummingbirds visit all summer. It is a good choice for hot spots next to driveways and walls where softer plants burn.

    Small trees

    Desert willow is a small, often multi-trunked tree with orchid-like pink, purple or white flowers from late spring through summer. It is not a true willow, and it does not need the water a willow needs. Expect it to leaf out later in spring than other trees, which sometimes makes new owners think it has died. Give it until late May before you worry. It casts light, filtered shade, which makes it a good choice near a patio or in a bed where you still want sun to reach plants underneath.

    When should you plant in Prescott?

    Timing affects survival as much as plant choice does. In general, you want new roots growing in cool weather with some natural moisture, not trying to get started during the dry heat of June.

    Early fall: the best window for hardy plants

    September through mid-October is the most forgiving time to plant cold-hardy shrubs, grasses and perennials. The soil is still warm from summer, so roots keep growing, while the air is cooling and evaporation drops. Winter storms then add moisture, and by spring the plant has a head start before the dry season arrives. Most of the natives on our list establish best when planted at this time of year.

    Spring: after the last freeze

    The average freeze season in Prescott ends around the first of May, but a late frost can still happen after that. Frost-tender plants and anything rated borderline for our zone should wait until the forecast looks reliably frost-free. You can check the latest local outlook from the Flagstaff forecast office of the National Weather Service, whose coverage includes the Prescott area. Spring plantings need careful watering, because they head straight into the driest months of the year.

    Monsoon planting

    Planting in July or early August can also work, since monsoon storms supply extra moisture and humidity. The risk is that heavy rain can wash out new beds, and some years the monsoon arrives late or falls short. If you plant during the monsoon, keep the drip system running and be ready to water by hand if the storms skip your neighborhood.

    What to avoid

    Late May and June are the hardest months to start new plants. Planting in December and January is also risky for anything except the very toughest natives, since frozen soil stops root growth and the plant can dry out without being able to take up water.

    How do you plant so the roots actually establish?

    A drought tolerant plant only becomes drought tolerant once its roots have spread well beyond the original root ball. These steps give it the best chance:

    1. Water the plant in its pot the day before planting so the root ball is evenly moist.
    2. Dig wide, not deep. Make the hole two to three times as wide as the root ball but only as deep as the pot. Roughen the sides of the hole so roots can push into the surrounding soil.
    3. Set the plant slightly high. The top of the root ball should sit level with or just above the surrounding grade. Agaves, manzanita and other plants that hate wet crowns do best on a slight mound.
    4. Backfill with native soil. For most desert-adapted plants, skip heavy compost. Rich backfill can make roots circle inside the hole instead of growing outward, and it can hold too much water during the monsoon.
    5. Loosen circling roots. If roots wrap around the outside of the root ball, tease them apart or make a few shallow vertical cuts so they grow outward.
    6. Build a shallow watering basin just beyond the edge of the root ball, then water slowly until the whole area is soaked.
    7. Add mulch. A layer of gravel or decomposed granite around the base helps keep moisture in and weeds down. Keep it a few inches away from the stem.
    8. Protect from critters. Rabbits, deer and javelina all live around Prescott. A simple wire cage for the first season or two can save a young plant.
    Desert rock garden with low-water shrubs and boulders in a Yavapai County yard
    Boulders and gravel keep roots cool and help water soak in around low-water plants instead of running off.

    How much water do new plants need?

    This is where most new plantings succeed or fail. A plant labeled “drought tolerant” still needs regular water while its roots grow. The aim is to water deeply and then let the top of the soil dry before the next watering, so roots follow the moisture down and out.

    Exact amounts depend on plant size, soil, sun and weather, so treat the schedule below as a starting point and check the soil with a finger or a long screwdriver before each watering.

    Stage Typical frequency (warm months) Typical frequency (cool months) Goal
    First 2–3 weeks Every 2–3 days Every 4–7 days Keep the root ball moist while roots reach the native soil
    Rest of first season Every 4–7 days Every 10–14 days Water deeper and less often to pull roots outward
    Second year Every 7–14 days Every 3–4 weeks, or rely on storms Build a wide root system that can handle dry spells
    Established (year 3+) Every 2–4 weeks in dry spells, less during the monsoon Occasional deep watering in long dry winters Survive mostly on natural rainfall with backup

    Each watering should soak the full root zone. For small perennials that might mean the top 12 inches of soil. For shrubs, aim for about 18 to 24 inches, and for trees, deeper still. A slow, long drip cycle does this much better than a quick spray.

    Turn the frequency down once monsoon storms start soaking the ground in July. Many overwatered plants die in August, not June, because the timer kept running while the clouds were doing the work. Then turn it back up in September if the rains taper off early, and remember that a dry, sunny winter still calls for an occasional deep watering, especially for evergreens.

    Why grouping plants by water need saves the most water

    The most common irrigation problem we see is a single drip zone feeding everything from thirsty roses to agaves. To keep the roses alive, the zone runs too often, and the agaves rot. The fix is called hydrozoning: grouping plants with similar water needs together and putting each group on its own valve.

    • Very low water: agaves, red yucca, rabbitbrush and established manzanita. These may need water only during long dry spells once established.
    • Low water: Apache plume, cliffrose, blue grama, penstemons and desert willow. They need regular deep watering at first, then occasional summer water.
    • Moderate water: anything that is not desert-adapted, along with vegetable beds and container plants. Keep these near the house where you see them often, and on their own zone.

    The EPA WaterSense guidance on what to plant makes the same point: choosing plants suited to your region and grouping them by need does more than any gadget to cut outdoor water use. If your yard already has drip lines, it is often possible to split an existing zone or re-route emitters rather than starting from scratch. Our irrigation and xeriscaping team does this kind of rework regularly.

    Emitter size matters too. A small perennial may only need one low-flow emitter. A shrub usually needs two or more placed at the edge of the root ball, and those emitters should be moved outward as the plant grows. Trees need a ring of emitters well out from the trunk, because that is where the feeder roots spread.

    Mistakes that kill even tough plants

    Most failed desert plantings are not caused by bad plants. They come from a few avoidable habits:

    • Buying for Phoenix. Many plants sold statewide are rated for the low desert. If the tag lists zone 9 or warmer, it will probably struggle through a Prescott winter.
    • Watering on a fixed schedule all year. A timer set in June and never touched again will drown plants during the monsoon and over-water them all winter.
    • Shallow, frequent sprinkles. Five minutes a day keeps roots near the surface, where they cook in summer and freeze in winter.
    • Burying the crown. Planting too deep, or piling gravel against stems, invites rot after heavy rain.
    • Heavy fertilizer. Rich feeding pushes soft, leggy growth that cold and wind damage easily. Most natives prefer lean soil.
    • Pruning at the wrong time. Heavy cutting in late summer encourages tender new growth right before the first freeze. Major shaping is usually best done in late winter or early spring, after the worst cold has passed.
    • Crowding. A one-gallon Apache plume looks small in the nursery but can spread six feet across. Space plants for their mature size and fill gaps with gravel, boulders or short-lived perennials while they grow.

    If a planting is already struggling, our yard maintenance crew can check emitters, adjust timers and replace plants that were never right for the spot.

    High desert garden with gravel, boulders and low-water shrubs spaced for their mature size
    Plants spaced for their full size, with gravel and boulders filling the gaps while they grow.

    Planting notes for Dewey-Humboldt, Chino Valley, Prescott Valley and Prescott

    Growing conditions can change a surprising amount from one town to the next, sometimes within a few miles.

    Prescott. Higher neighborhoods, especially those closer to the forest edge, see colder nights and more snow than lower parts of town. Granite soils, rocky slopes and shade from pines and oaks are common. Manzanita, cliffrose and blue grama feel right at home here. Sloped lots often need terraced beds, and our retaining wall work frequently creates the level planting pockets these plants need. See our Prescott landscaping page for more on how we approach yards there.

    Prescott Valley. Many homes sit on flatter, more open lots with block-wall backyards that heat up in the afternoon. Walls reflect heat onto beds and can shelter plants from wind, which gives you more choices along south-facing edges. Our office is here, and our Prescott Valley landscaping page shows the kind of work we do nearby.

    Chino Valley. Lower in elevation but more exposed, Chino Valley properties tend to be larger and windier. Tough, spreading shrubs like Apache plume and rabbitbrush cover ground efficiently on big lots, and drip lines need to be planned for long runs. Visit our Chino Valley landscaping page for more.

    Dewey-Humboldt. Lots here often feel rural, with native vegetation all around. Matching the surrounding landscape with native grasses and shrubs helps a new yard blend in and keeps watering to a minimum. Our Dewey-Humboldt page covers what works well in that area.

    For anywhere else in the county, our service areas page lists everywhere we work.

    Want a planting plan built for your yard?

    We pick plants for the conditions your property actually has, then lay out drip zones so each group gets the water it needs and no more. Every project starts with a free estimate. Call (928) 848-0706 or share some photos and rough measurements, and we will set up a time to walk the yard with you. Our planting and irrigation work carries the protection of Arizona contractor license ROC 336502, with bond and insurance coverage in place. Want to see finished work first? Browse our project gallery or read about our landscape design process.

    Frequently asked questions

    When is the best time of year to plant drought-tolerant shrubs in Prescott?

    Early fall, from September to mid-October, is usually best for cold-hardy shrubs. The soil is still warm, so roots keep growing, while cooler air reduces water loss. Winter moisture then helps the plant settle in before the dry spring. Spring planting works too, but wait until frost risk has passed and plan on careful watering through May and June.

    How often should I water a new low-water plant during its first summer?

    For the first two to three weeks, water every two to three days so the root ball never dries out. After that, stretch it to every four to seven days, soaking the root zone each time. Cut back once monsoon rains are soaking the ground, and always check soil moisture with your finger before watering. The goal is deep, infrequent water.

    Will agaves survive a Prescott winter freeze?

    Some will and some will not. Parry’s agave is native to Arizona’s mountains and handles our winters well when planted in fast-draining soil. Many agaves sold for low-desert gardens are much less cold-hardy and can turn to mush after a hard freeze. Check the hardiness rating, plant on a slight mound and keep the crown dry in winter.

    Which ornamental grasses handle cold winters and dry springs?

    Blue grama is one of the most reliable. It is native, very cold hardy and greens up when summer rains arrive. Deer grass forms a larger fountain-shaped clump and also does well locally. Avoid grasses known to spread aggressively into wild land, and ask your nursery which ornamental grasses are considered invasive in Arizona before you buy.

    Is desert willow hardy enough for the Prescott area?

    Desert willow generally handles Prescott and Prescott Valley winters well, especially in a sunny, sheltered spot. It is one of the last trees to leaf out in spring, often not until May, so do not assume it died over winter. Give it deep water while young, then only occasional summer watering once it is established.

    Should I add compost to granite soil before planting native shrubs?

    For most native and desert-adapted shrubs, no. Granite-based soil drains well, which these plants prefer. Rich compost in the planting hole can hold too much water during the monsoon and make roots stay inside the hole instead of spreading out. Backfill with the soil you dug out, and save compost for vegetable beds and thirstier plants.

    Do drought-tolerant plants need fertilizer?

    Usually very little, if any. Most natives evolved in lean soil and grow soft, leggy and cold-sensitive when fed heavily. If a plant looks pale or stunted after its first year, check watering and drainage first, since those are far more common problems. A light, slow-release feeding in spring is plenty for the few plants that need it.

    How far apart should I space shrubs like Apache plume or cliffrose?

    Space them for the size they will reach, not the size of the pot. Apache plume can spread five or six feet across, and cliffrose can grow larger still. Plant them roughly that far apart from center to center. The yard will look sparse for a season or two, so fill the gaps with gravel, boulders or quick perennials that you can remove later.

    Can low-water plants grow in containers on a Prescott patio?

    Yes, but containers dry out and freeze faster than the ground does. Pick plants rated at least one zone colder than your area, use a gritty, fast-draining potting mix and large pots that hold more soil. Container plants need water more often than the same plants in the ground, and pots on a hot south-facing patio may need watering several times a week.

    How can I tell if a desert plant is getting too much water?

    Overwatered desert plants often show yellowing leaves that start at the base, soft or blackened stems, a mushy crown on agaves and yuccas, or sudden wilting even though the soil is wet. Dig down a few inches near the plant. If the soil stays damp days after watering, cut back the schedule or move the plant to better-drained ground.